AI Upscaling vs Traditional Upscaling: What's Actually Different?
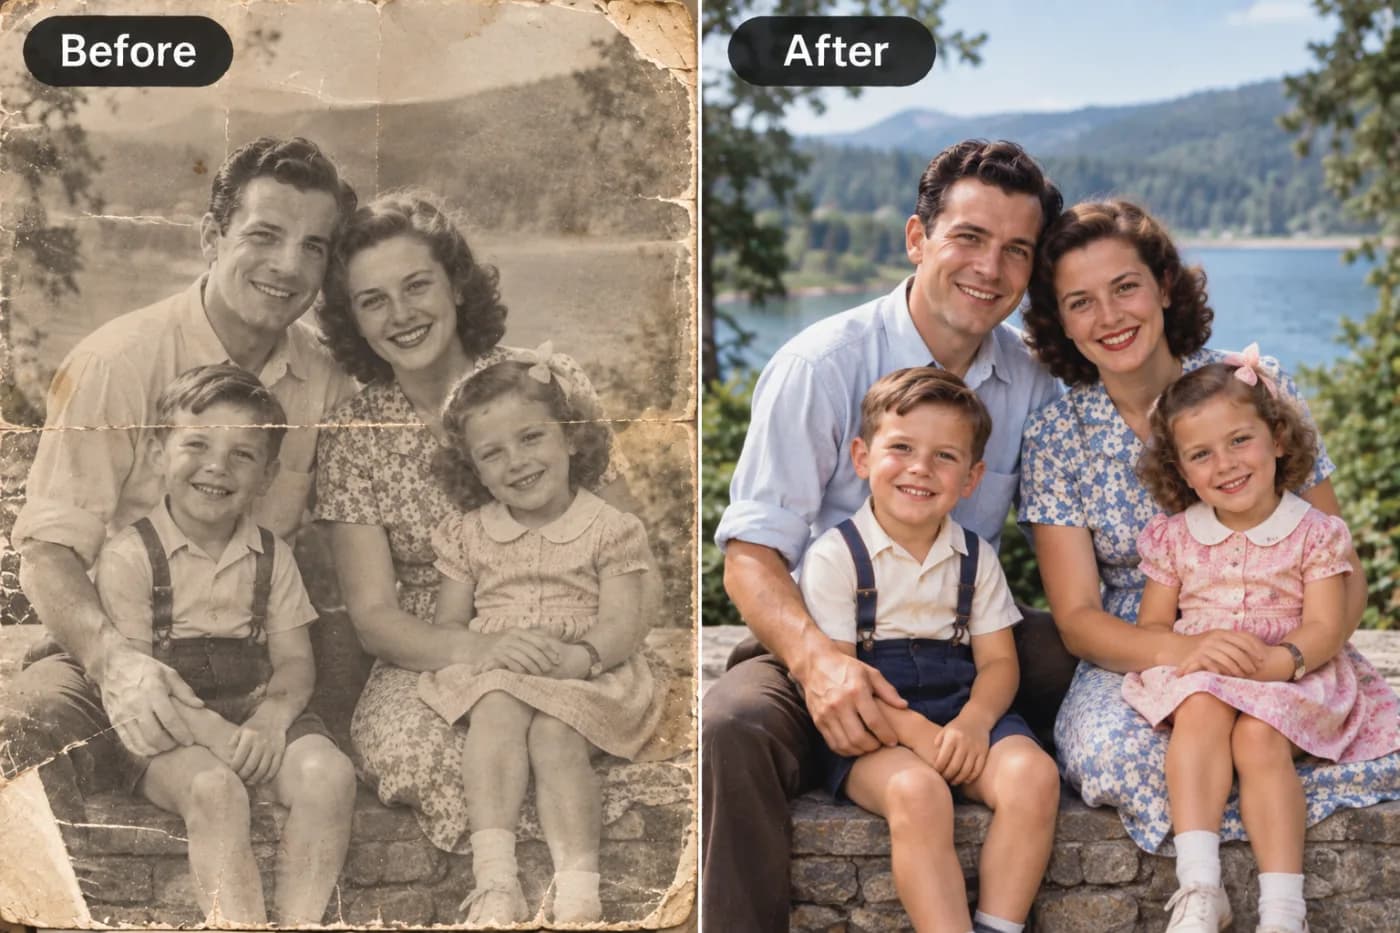
Bicubic interpolation averages pixels. AI super-resolution predicts reality. The difference is visible — and it matters for every use case.
The debate over AI upscaling vs traditional upscaling comes down to one fundamental difference: traditional methods *stretch* the pixels you already have, while AI *creates* new detail that was never there. That single distinction explains why an AI-upscaled photo can look razor-sharp while the same image resized in classic software looks like a blurry balloon. If you've ever wondered how AI upscaling works, or why your old photo editor's "enlarge" button produces such disappointing results, this guide breaks down exactly what's happening under the hood.
We'll compare super resolution vs bicubic interpolation in plain English, explain the machine learning that powers modern AI image enlargement, and show you when each approach actually makes sense. You don't need a computer science degree to follow along — just curiosity about why your images look the way they do. By the end, you'll understand not only *what's* different, but *why* it matters for every photo you enlarge, and how to get the best possible result from whatever source you're working with.
How Traditional Upscaling Actually Works
Traditional upscaling has been around for decades, and it's still what most basic software uses. The most common methods are nearest-neighbor, bilinear, and bicubic interpolation. All three share the same core limitation: they can only work with the pixels already in your image.
When you enlarge a photo traditionally, the software has to fill in the new, empty pixels between your original ones. Nearest-neighbor simply copies the closest existing pixel — fast, but it produces blocky, jagged edges. Bilinear averages the four surrounding pixels for a smoother but soft result. Bicubic — the gold standard of traditional methods, used in Photoshop's default resize — averages 16 surrounding pixels using a mathematical curve, producing smoother gradients than bilinear.
But here's the ceiling: bicubic is still just *guessing the average* of nearby pixels. It cannot invent an eyelash that wasn't captured, sharpen text that's already a blur, or recover the texture of fabric that was lost. It smooths, it blends, it stretches — but it never adds genuine new information. That's why traditionally upscaled images always look softer than the original. You're spreading the same amount of detail across more pixels, and the math can only interpolate, not imagine.
How AI Upscaling Works Differently
AI upscaling — often called super resolution — flips the entire approach. Instead of averaging neighboring pixels, it uses a neural network trained on millions of image pairs: a low-resolution version and its high-resolution original. Through this training, the model learns what real-world detail *should* look like when an image is enlarged.
So when you feed an AI upscaler a blurry photo of a face, it doesn't just blend pixels. It recognizes "this is an eye," "this is hair," "this is skin texture," and reconstructs plausible high-resolution detail based on everything it learned during training. It effectively *paints in* the detail a higher-resolution camera would have captured.
Modern systems use architectures like GANs (Generative Adversarial Networks) and diffusion models. In a GAN, one network generates the upscaled image while a second network critiques it, pushing the generator to produce results indistinguishable from real high-res photos. Diffusion models, the newest wave, reconstruct detail through a gradual denoising process that yields especially natural textures.
This is the crux of super resolution vs bicubic: bicubic asks "what's the mathematical average here?" while AI asks "what would a real high-resolution version of this actually look like?" The result is genuine detail — sharper edges, cleaner text, realistic textures — rather than a smoothed-over stretch.
Step-by-Step: Trying AI Upscaling Yourself
The best way to understand the difference is to see it. Here's how to run an AI upscale and compare it against a traditional resize, for free.
Step 1: Pick a test image. Choose a smallish photo — around 400-600px wide — ideally one with faces, text, or fine texture, since that's where the difference shows most.
Step 2: Do a traditional resize first. In any basic editor (Paint, Preview, or Photoshop's Image Size with bicubic), enlarge it 4x. Save it. Notice how soft it looks up close.
Step 3: Open Pixel Shine's upscaler. Open it. Normal Upscale is free, unlimited, and needs no sign-in.
Step 4: Upload the same original. Drag your test image into the upload box — use the original, not your traditionally-resized version.
Step 5: Select 4x and process. Choose the same 4x factor you used traditionally so it's a fair comparison. For maximum detail on faces, try Pro AI mode.
Step 6: Compare side by side. Open both results at 100% zoom. Look at edges, text, and texture. The AI version will show reconstructed detail where the bicubic version shows soft blur.
Step 7: Test the limits. Try an even harder image — an old scan or a heavily compressed screenshot — to see where AI still shines and where source quality becomes the bottleneck.
Pro Tips for Better AI Upscaling
Understand that AI infers, it doesn't magic. The model reconstructs *plausible* detail based on training. On faces and common objects it's remarkably accurate; on unusual textures or text in unfamiliar fonts, it makes educated guesses. Verify important details.
Use the highest-quality source available. AI has more to work with when the input isn't already destroyed by compression. An original file beats a re-saved copy every time.
Choose the right model for the content. Basic AI upscaling handles graphics and simple photos well. Diffusion-based Pro modes excel at portraits, skin, and fine organic texture. Match the tool to the job.
Don't stack traditional and AI upscaling. Resizing traditionally first, then AI-upscaling the soft result, feeds the AI degraded input. Always start from the original.
Watch for over-smoothing on portraits. Some models can make skin look waxy at extreme magnification. If that happens, drop from 4x to 2x, which usually preserves a more natural look.
Compare at 100% zoom, not fit-to-screen. Both methods can look fine zoomed out. The real differences — reconstructed vs smoothed detail — only appear at full resolution.
Common Mistakes to Avoid
Believing AI can recover any lost detail. AI reconstructs *plausible* detail, not the exact original. For a badly pixelated license plate or tiny distant text, it will produce something that looks right but may not be accurate. Don't treat it as forensic recovery.
Judging quality zoomed out. At fit-to-screen, even bicubic looks acceptable. If you don't inspect at 100%, you'll never see the difference AI makes — or catch artifacts if they appear.
Using traditional resize when AI is free. There's no reason to settle for bicubic blur when a free, unlimited AI upscaler exists. Old habits from legacy software cost you quality for no reason.
Over-upscaling tiny sources. Even AI struggles to turn a 50x50px icon into a poster. There's a sensible limit — 2x to 4x from a reasonable source produces the best results.
Ignoring the file format. Upscaling a heavily compressed JPG bakes its artifacts into a larger image. When possible, start from PNG or a high-quality original.
When to Use Each Method
Despite AI's clear advantages, traditional upscaling still has a place — knowing when to use which saves time and produces the best results.
Use AI upscaling when: you're enlarging photos of people, products, or detailed scenes; you need the result to look sharp for print, social, or professional use; the source is low-resolution and you want to recover perceived detail; or you're rescuing old, soft, or compressed images. This covers the vast majority of real-world enlargement needs.
Traditional (bicubic) upscaling is fine when: you're doing a tiny enlargement (1.1x to 1.5x) where the softness is negligible; you need pixel-perfect predictability for technical work; you're working with flat graphics or pixel art where AI might "invent" unwanted detail; or you need instant, offline processing with zero tools.
For most people, though, the calculus is simple. AI upscaling now matches traditional methods for speed and beats them decisively on quality, and free tools like Pixel Shine remove the old cost barrier entirely. The main reason anyone still defaults to bicubic is habit — it's the button built into legacy software. Once you've compared results at 100% zoom, it's hard to go back.
Real-World Results: Where AI Wins
Old family photos: A faded 1970s snapshot scanned at low resolution comes back with defined faces and readable detail through AI, where bicubic just enlarges the blur.
E-commerce product shots: A supplier's 500px image gets AI-upscaled to meet Amazon's 1000px+ zoom requirement with crisp edges, versus a soft bicubic stretch that fails the quality bar.
Screenshots for presentations: A low-res UI screenshot destined for a projector or 4K display stays legible after AI upscaling instead of turning into a pixelated mess.
Real estate listings: Phone-shot property photos gain the sharpness that makes listings look professional on large monitors.
Video thumbnails and graphics: Small source assets scale up to platform requirements without the tell-tale softness of interpolation.
In every one of these cases, the difference isn't subtle — it's the gap between "this looks amateur" and "this looks intentional." And with free AI upscaling widely available, there's no longer a cost reason to settle for the traditional result.
Frequently Asked Questions
What is the difference between AI upscaling and traditional upscaling?Traditional upscaling (like bicubic interpolation) stretches and averages existing pixels, producing a softer, larger version of the same detail. AI upscaling uses neural networks trained on millions of images to reconstruct genuinely new detail, yielding sharper, more realistic results.
What is super resolution?Super resolution is the technical term for AI-based upscaling that reconstructs high-resolution detail from a low-resolution input using machine learning, rather than simple mathematical interpolation.
Is bicubic or AI upscaling better?For almost all real-world photos, AI upscaling produces noticeably better quality because it adds real detail rather than smoothing pixels. Bicubic is only preferable for tiny enlargements or flat graphics where predictability matters.
How does AI upscaling actually work?A neural network is trained on pairs of low- and high-resolution images. It learns what real detail looks like, then applies that knowledge to reconstruct plausible high-resolution detail in your image — effectively painting in what a better camera would have captured.
Can AI upscaling recover text and faces?It does an excellent job reconstructing faces and common objects. For text, it works well on reasonably legible sources but can guess incorrectly on severely degraded characters, since it infers rather than truly recovers.
Is AI upscaling slow?Modern AI upscalers process most images in seconds — comparable to traditional methods for typical photo sizes. Pixel Shine's free Normal Upscale is fast enough for everyday use.
Does AI upscaling change the original image?It creates a new, higher-resolution version while leaving your original file untouched. The process reconstructs detail but doesn't alter your source.
Can I try AI upscaling for free?Yes. Pixel Shine offers free, unlimited Normal Upscale with no sign-in, so you can compare it against traditional methods yourself.
Key Takeaways
The core difference in AI upscaling vs traditional upscaling is simple but profound: bicubic and its cousins stretch existing pixels, while AI reconstructs new detail using models trained on millions of images. That's why AI results look sharp and natural where traditional methods look soft and stretched.
For virtually every photo you'll ever enlarge — portraits, products, screenshots, old scans — AI is the clear winner, and free tools have erased the old cost barrier. The best way to believe it is to see it. Upload a test image to the Pixel Shine upscaler, compare it against a bicubic resize at 100% zoom, and watch the difference for yourself.
Try AI Upscaling →