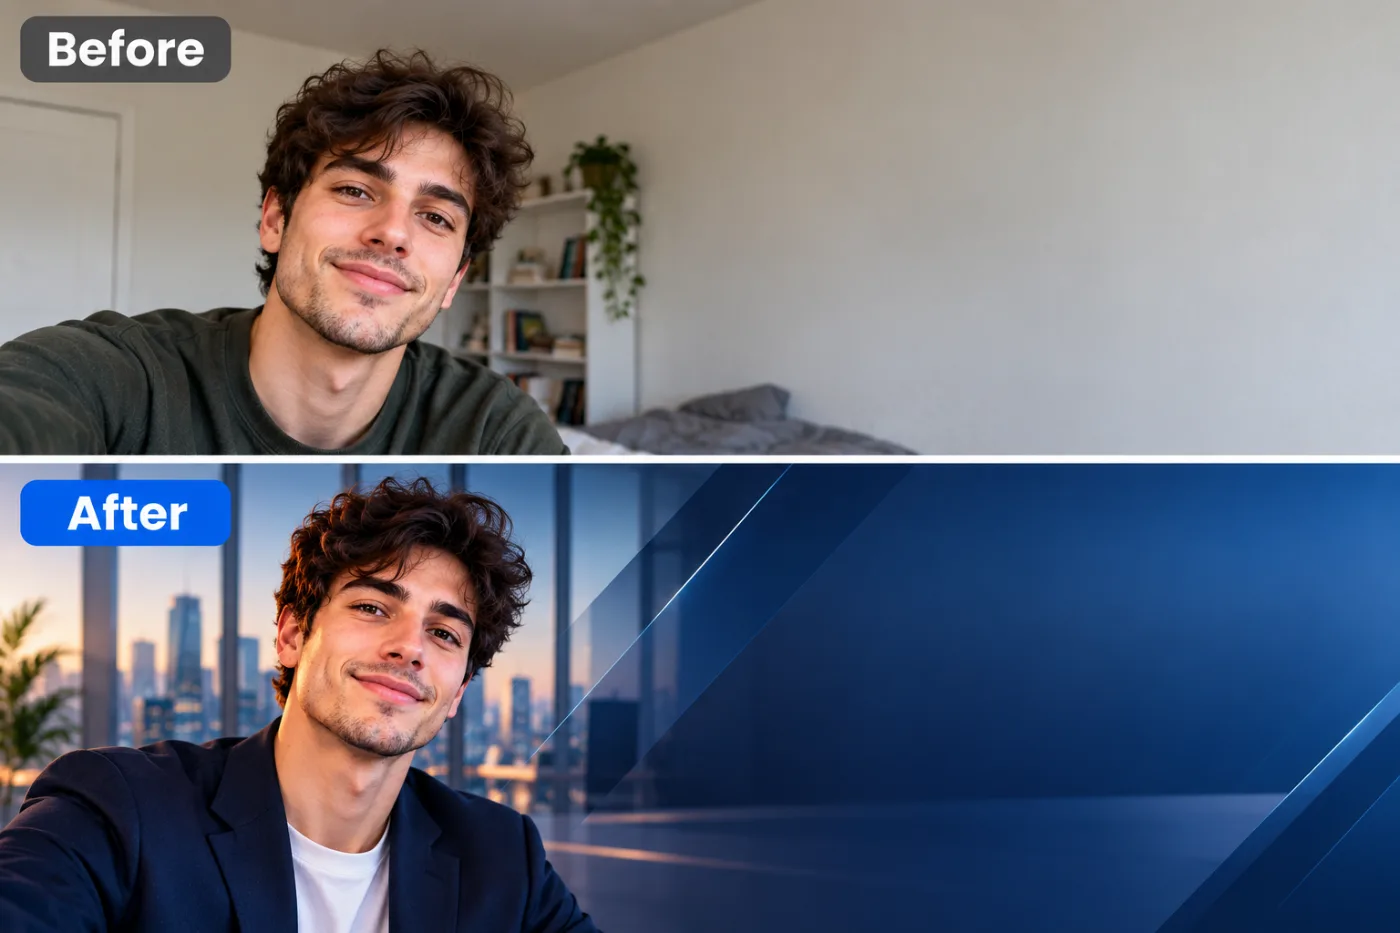
AI Headshot Generator: Get a Professional LinkedIn Photo in Seconds
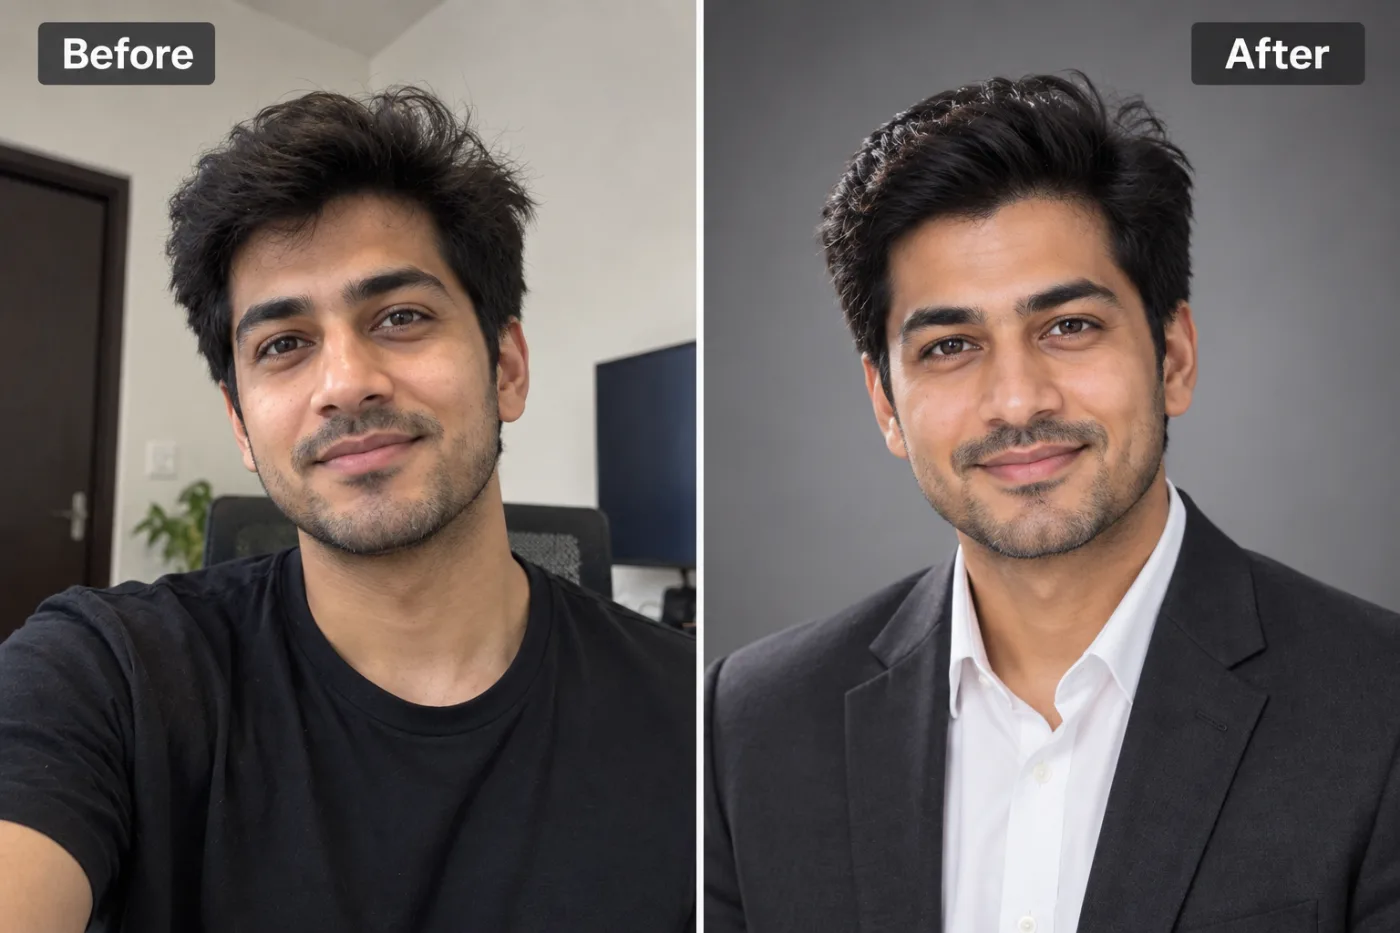
A great LinkedIn photo can increase profile views by 21×. You no longer need a photographer or studio — AI can generate a professional headshot from any clear photo of yourself.
An AI headshot generator can turn an ordinary selfie into a polished, studio-quality LinkedIn headshot in seconds — no photographer, no studio booking, and no awkward posing in front of a stranger's camera. Just upload a clear photo of yourself, and AI produces a professional photo online with clean lighting, a neutral background, and a confident, corporate look. For anyone who needs to update their profile fast, it's the most affordable way to get an AI professional photo that actually looks the part.
Here's why this matters: LinkedIn's own data has long shown that profiles with a professional photo get dramatically more views and connection requests than those without. Yet a proper studio headshot can cost $150 to $400 and take days to schedule and receive. An AI headshot generator collapses that into minutes and a fraction of the price. Pixel Shine makes it especially approachable: the whole platform runs online with no expensive software. This guide walks through how it works, how to get the best results, and how to look genuinely professional.
Why AI Headshots Are Replacing the Studio
The traditional headshot process is expensive, slow, and inconvenient — and AI fixes all three problems at once.
Cost. A professional headshot session typically runs $150 to $400 and up, depending on the photographer and city. For a single profile photo, that's a steep price. AI headshot generation costs a tiny fraction of that.
Time. Booking a studio, traveling there, doing the shoot, and waiting for edited files can stretch across a week or more. AI produces your headshot in seconds from a photo you already have. Need it updated tonight? Done tonight.
Convenience and comfort. Plenty of people freeze up in front of a professional camera. With AI, you work from a relaxed selfie taken at home — no posing pressure, no small talk, no scheduling around someone else's calendar.
Iteration. With a studio shoot, you're locked into what you got that day. With an AI generator, you can try different looks, backgrounds, and styles, and regenerate until you're happy. That flexibility is impossible in a one-off session.
The result is a professional-looking headshot that rivals studio output for the vast majority of use cases — LinkedIn, resumes, email signatures, company directories, speaker bios, and personal websites — at a small fraction of the cost and effort.
What Makes a Headshot Look Professional
Understanding what separates a professional headshot from a casual selfie helps you get better results and pick the best output.
Clean, even lighting. Professional headshots use soft, flattering light that eliminates harsh shadows under the eyes and chin. AI generators simulate this studio lighting automatically, which instantly elevates a flat phone photo.
A neutral, uncluttered background. Distracting backgrounds pull focus away from you. Professional headshots use solid neutral tones or softly blurred backdrops — grays, blues, whites, or a tasteful office blur. AI replaces your messy home background with exactly this kind of clean setting.
Appropriate attire and framing. A professional look usually means business or business-casual clothing and framing from roughly the chest up, with your face occupying a confident portion of the frame. Good AI generators handle wardrobe and composition to match this standard.
A natural, approachable expression. The best headshots show a genuine, relaxed expression — a slight smile, eyes engaged. This comes from your source photo, which is why choosing a good input selfie matters so much.
Sharp, high-resolution output. A crisp image signals professionalism; a soft, pixelated one undermines it. Quality AI output is sharp and clean, and you can upscale it further if you need it larger for print or a high-density display.
Step-by-Step: Generate Your Professional Headshot
Here's how to create a LinkedIn-ready headshot with Pixel Shine. It takes just a few minutes.
Step 1 — Open the AI Headshot Generator. Go to Pixel Shine and open the AI Headshot tool.
Step 2 — Choose a great source photo. Pick a clear, well-lit photo where your face is fully visible, facing roughly forward, with no sunglasses or heavy shadows. A simple selfie in decent daylight works well. The clearer your input, the more accurate your headshot.
Step 3 — Upload the image. Drag and drop or browse to upload your selected photo. Make sure it's in focus and reasonably high resolution.
Step 4 — Select your style. Choose the professional look you want — background tone, attire style, and overall vibe (corporate, business-casual, creative, and so on). Match it to your industry: banking and law lean formal; tech and startups can go more relaxed.
Step 5 — Generate. Start the process and let the AI work. In seconds, it produces a polished headshot with studio lighting, a clean background, and professional framing.
Step 6 — Review and refine. Look over the result, checking that your face looks natural and true to you. If you want a different look, adjust the style or source photo and regenerate.
Step 7 — Upscale and download. For a razor-sharp final image, run it through Pixel Shine's upscaler, then download. Now it's ready for LinkedIn, your resume, or your email signature.
Pro Tips for the Best AI Headshot
These tricks make the difference between an obvious AI photo and one that looks like a real studio shot.
1. Use a sharp, front-facing source. The AI works from your input photo, so a clear, well-lit, forward-facing selfie yields the most accurate, natural result. Avoid extreme angles and dim lighting.
2. Keep your expression natural. A relaxed, slight smile reads as approachable and confident. Choose a source photo where you look genuinely at ease rather than stiff.
3. Match the style to your field. A corporate navy-background look suits finance and law; a lighter, business-casual style fits tech, design, and creative roles. Pick the style your target audience expects.
4. Avoid busy accessories in the source. Hats, sunglasses, and heavy jewelry can confuse the generation. A clean, simple source photo gives the cleanest output.
5. Generate a few variations. Don't settle on the first result. Try a couple of styles and pick the one that looks most like you and most polished.
6. Upscale the final pick. Run your chosen headshot through the upscaler for maximum sharpness — especially important since LinkedIn and high-density screens can make soft images look dated.
Common Mistakes to Avoid
Sidestep these to make sure your AI headshot helps rather than hurts your professional image.
Using a low-quality source photo. A blurry, dark, or heavily-filtered selfie produces a weaker result. Start with the clearest, best-lit photo of yourself you can find.
Picking a style that clashes with your industry. An ultra-casual look for a formal profession — or an overly stiff corporate look for a creative role — sends the wrong signal. Match the style to your field's norms.
Choosing an unnatural expression. A forced or exaggerated expression carries over into the result. Pick a source where you look relaxed and genuine.
Making it look nothing like you. The goal is a polished version of you, not a stranger. If a result drifts too far from your real appearance, regenerate with a better source or a subtler style — people should recognize you when they meet you.
Skipping the sharpening step. A slightly soft output can look unprofessional at full size. Take the extra few seconds to upscale your final pick so it's crisp everywhere it appears.
AI Headshots vs. Studio and DIY Alternatives
How does an AI headshot stack up against your other options? Here's an honest comparison.
vs. a professional studio shoot. A studio delivers top-tier quality and a photographer's eye, but at $150 to $400+, a week of lead time, and the need to show up in person. For executive portraits and high-stakes branding, a studio still has its place. For LinkedIn, resumes, and everyday professional use, AI delivers 90% of the polish at a tiny fraction of the cost and time.
vs. a DIY smartphone headshot. Modern phones take great photos, but replicating studio lighting and a clean background at home is genuinely hard. AI adds the professional lighting and backdrop you can't easily create in your living room, so the result looks far more intentional than a raw selfie.
vs. free but limited AI tools. Some AI headshot tools lock every decent result behind a subscription or watermark. Pixel Shine adds no watermark, and — crucially — the same platform includes upscaling, background removal, and photo editing. So you can generate, sharpen, and tweak your headshot in one place instead of paying for and juggling multiple single-purpose apps. For most people, AI is the clear winner on value, speed, and convenience.
Who Uses AI Headshots (Real Scenarios)
AI headshots have quietly become a default tool for a wide range of professionals.
Job seekers updating their LinkedIn and resume before applying — a professional photo measurably boosts profile views and recruiter trust, so a sharp headshot is a small edge that matters.
Remote teams building consistent company directories and About pages. Instead of coordinating a photographer for a distributed team, everyone generates a matching-style headshot from home.
Freelancers and consultants who need polished profiles across LinkedIn, their personal website, and proposal documents to win client trust.
Sales and client-facing professionals whose photo appears in email signatures, CRM profiles, and pitch decks, where looking approachable and credible drives real outcomes.
Speakers and authors who need clean bio photos for event pages and book jackets on short notice.
Students and new grads entering the job market who can't yet justify a $300 studio session but still want to present professionally. In each case, AI delivers a credible, recognizable, professional photo fast and affordably.
Getting the Most Professional Result
A few final considerations help your AI headshot look its absolute best across every platform where it'll appear.
Match the crop to the platform. LinkedIn displays profile photos in a circle, so make sure your face is centered and not cut off at the edges. For resumes and directories, a standard head-and-shoulders crop works everywhere.
Keep it recognizable and current. Your headshot should look like you look now. An accurate, up-to-date photo builds trust when you meet people in person or on video calls — you want them to recognize you instantly.
Use consistent branding. If you're building a personal brand, pick a style and background tone you can reuse across platforms so your presence looks cohesive.
Consider a few looks for different contexts. A slightly more formal version for LinkedIn and a warmer one for a personal site can each fit their setting. Because generating with AI is fast and cheap, creating a small set of on-brand headshots is realistic in a way a studio session never was.
Frequently Asked Questions
How much does an AI headshot cost?Far less than a studio session. Pixel Shine's credits are inexpensive — a fraction of the $150 to $400 a professional photographer typically charges.
Do AI headshots look real?Yes — good ones look like polished, studio-quality photos of you. The key is starting with a clear, well-lit, front-facing source photo so the result stays natural and recognizable.
Are AI headshots good enough for LinkedIn?Absolutely. For LinkedIn, resumes, email signatures, and company profiles, a quality AI headshot is more than good enough and looks distinctly more professional than a casual selfie.
What kind of photo should I upload?A clear, well-lit selfie facing roughly forward, with your full face visible and no sunglasses or heavy shadows. Higher resolution and good lighting produce the best results.
Can I choose the background and style?Yes. You can select the background tone, attire style, and overall vibe to match your industry — from formal corporate to relaxed business-casual.
Is there a watermark?No. Your headshots download watermark-free.
How long does it take?Seconds. Once you upload your photo and pick a style, the AI generates your headshot almost immediately — no waiting days for a photographer to deliver.
Can I make the headshot sharper for printing?Yes. Run your final headshot through Pixel Shine's upscaler to increase resolution and sharpness for print or high-density displays.
Key Takeaways
An AI headshot generator gives you a professional LinkedIn photo in seconds — without the $150-to-$400 price tag, the week-long wait, or the awkward studio session. Upload a clear, well-lit selfie, choose a style that fits your industry, generate, and you have a polished, studio-quality headshot ready for your profile, resume, or email signature.
For the best result, start with a sharp front-facing source photo, keep your expression natural, match the style to your field, generate a few variations, and upscale your final pick for maximum sharpness. Avoid low-quality inputs and styles that clash with your profession, and make sure the result still clearly looks like you.
Ready for a headshot that gets your profile noticed? Head to Pixel Shine, open the AI Headshot Generator, and create a professional photo in seconds. Generate Your Headshot →