How to Edit Photos with AI Text Prompts (No Photoshop Needed)
Describing what you want to change is faster than doing it manually. AI photo editing lets you type instructions like a director and get professional results instantly.
Photo editing has always required a steep learning curve — understanding layers, masks, blend modes, adjustment curves, and dozens of other concepts before you can make a single meaningful change. AI text-prompt editing removes that barrier entirely. Instead of learning how to do something, you simply describe what you want. The AI handles the technical execution. This guide explains how it works, what's possible, and how to write prompts that get the best results.
The End of Complex Photo Editing
Photoshop and Lightroom are incredibly powerful tools — but they're built for professionals who spend years learning them. Most people who want to change a background, fix lighting, or remove an object don't want to learn masking techniques. They want the result, not the process. AI text-prompt editing is the equivalent of hiring a skilled photo retoucher who follows your verbal instructions — except it costs a few credits and takes seconds rather than hours or hundreds of pounds.
What Can You Edit with Text Prompts?
JPT AI's prompt-based editing can handle a wide range of transformations:
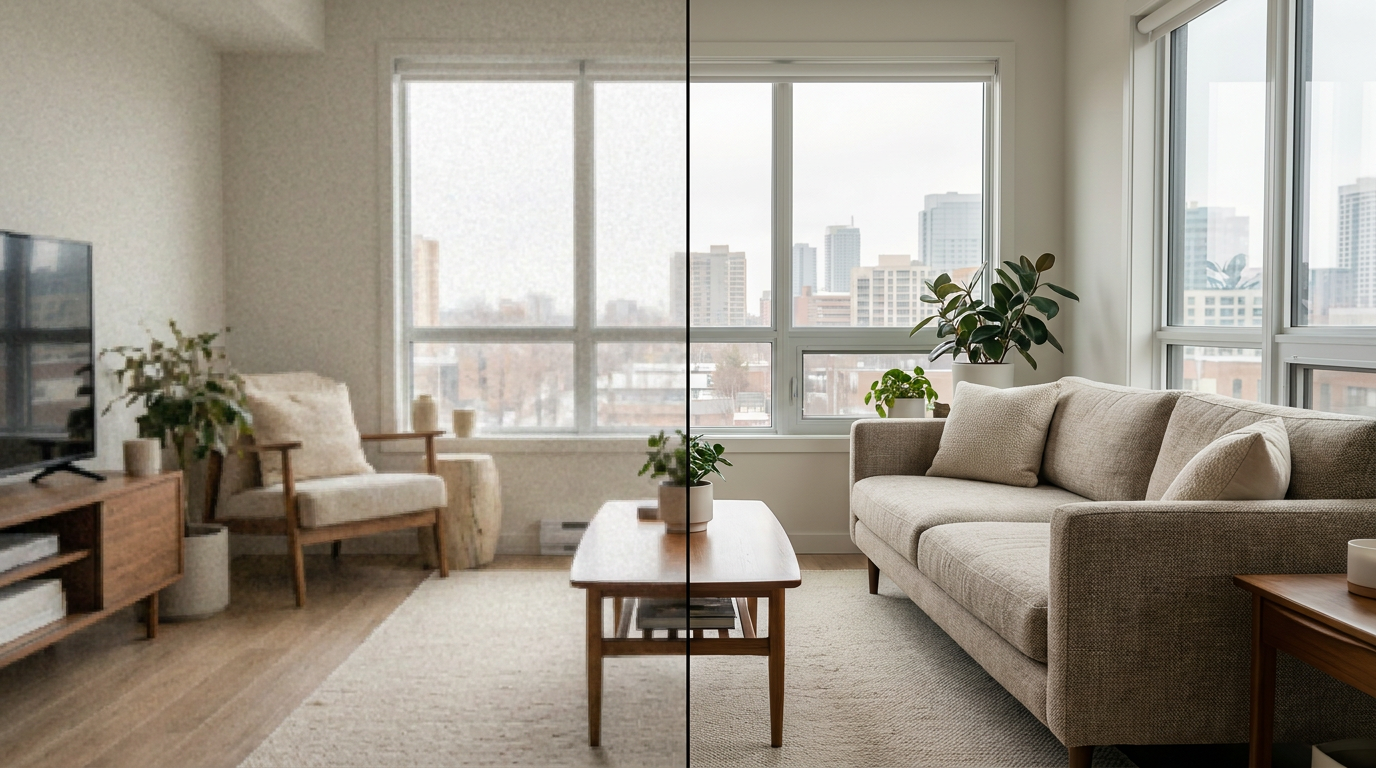
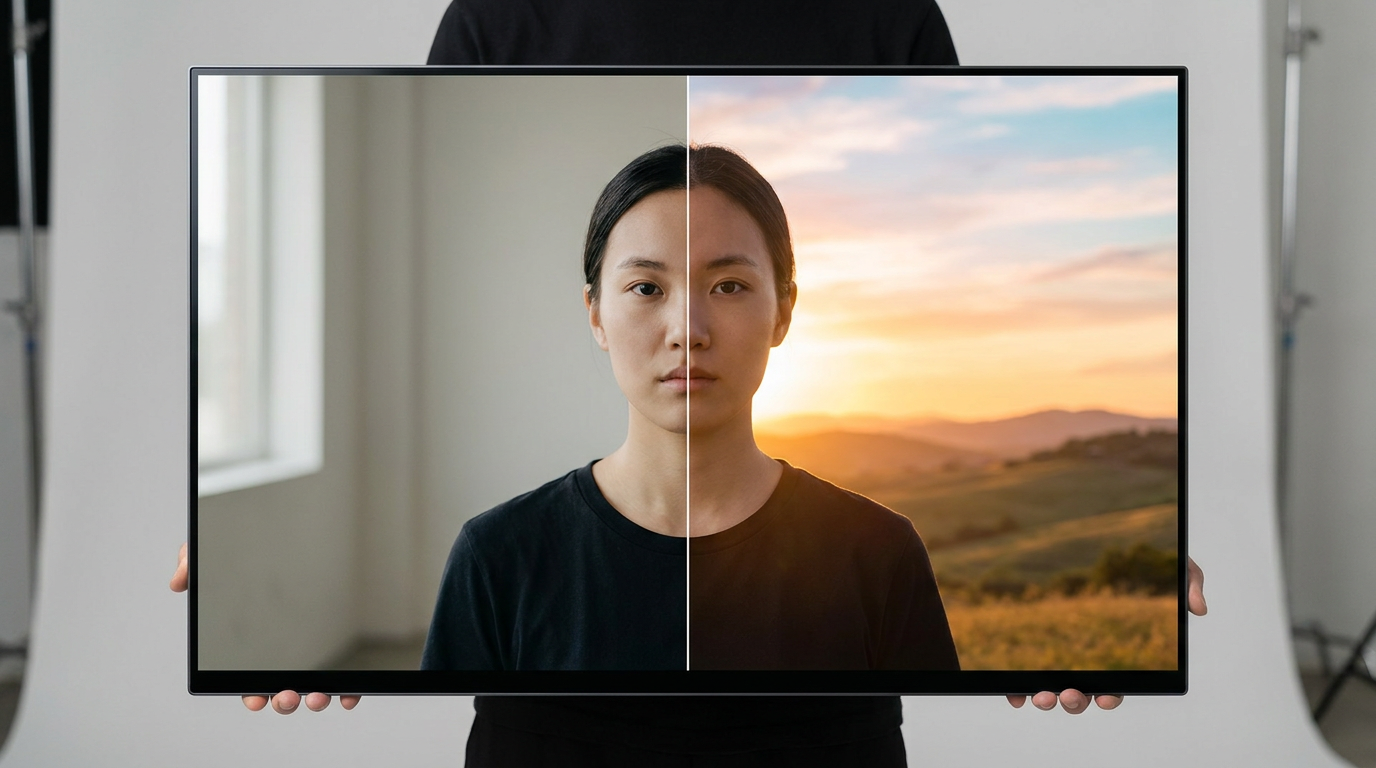
Background replacement. Swap the background for any scene you describe: 'replace the background with a modern office', 'add a sunset beach background', 'put me in front of the Eiffel Tower'.
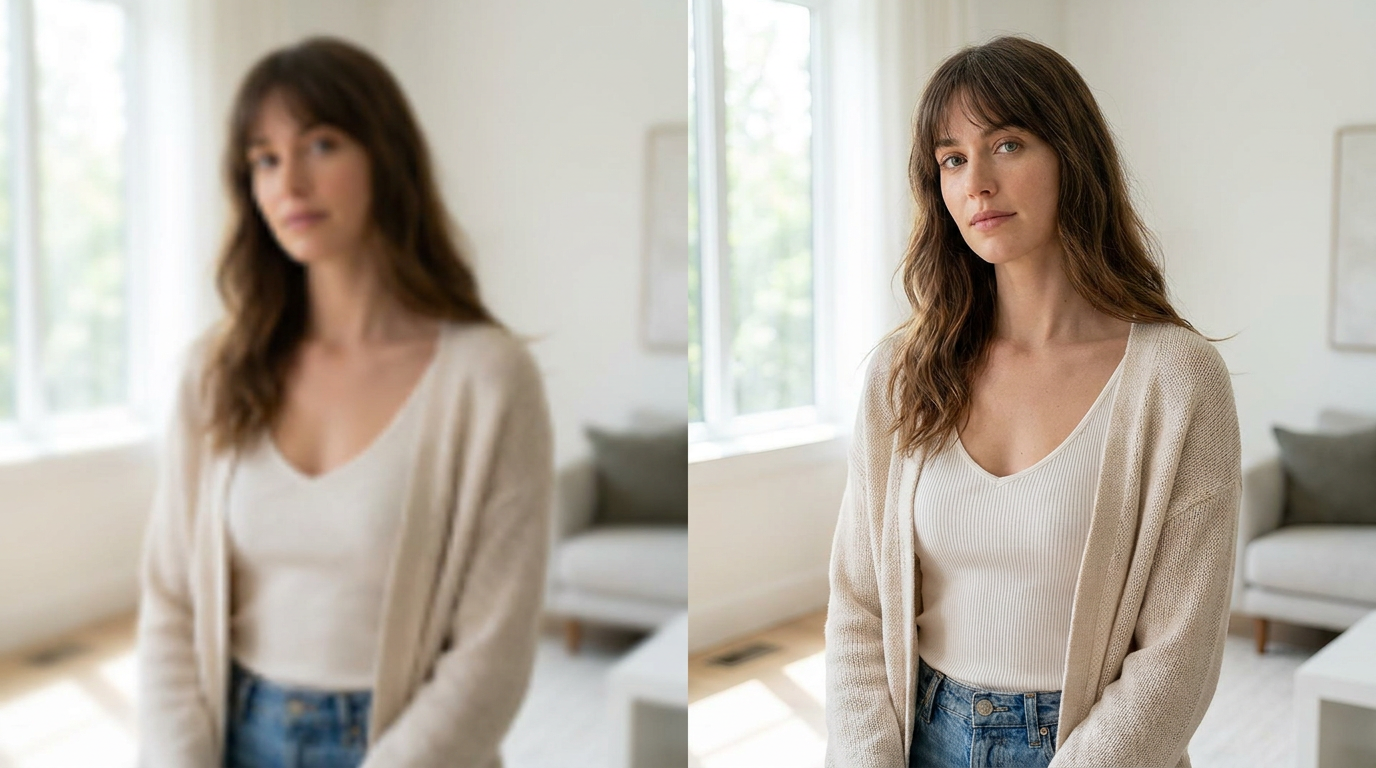
Lighting changes. 'Add dramatic cinematic lighting', 'make the lighting softer and warmer', 'add a golden hour glow'.
Style transfers. 'Make this look like a film photograph', 'add a vintage 1970s colour grade', 'make this look like a painting'.
Colour and mood. 'Desaturate the background while keeping the subject in colour', 'make the colours more vibrant and punchy', 'convert to black and white with strong contrast'.
Subject changes. 'Change the shirt colour to navy blue', 'make the sky more dramatic with storm clouds', 'add autumn leaves to the trees'.
Writing Effective Edit Prompts
The quality of your edit depends heavily on prompt specificity. Vague prompts produce vague results.
Be specific about the subject. Instead of 'change the background', try 'replace the background with a softly blurred modern city street at dusk, bokeh lights'.
Describe the visual quality. Add qualifiers like 'photorealistic', 'cinematic quality', 'professional photography', 'high resolution' to steer the AI toward polished results.
Reference real styles. 'Shot on a 50mm lens with shallow depth of field' or 'lit like a Rembrandt portrait' gives the AI specific visual targets.
Preserve what you want to keep. Always include 'keep the subject (person/product/object) exactly as-is' to prevent the AI from modifying things you want to keep.
Layer your instructions. More detail = better results. 'Dramatic golden hour lighting, warm orange tones, soft bokeh background, cinematic colour grade' works better than 'better lighting'.
Step-by-Step Guide
Step 1 — Upload your image. Go to jpptai.com/editor and drag your image onto the upload zone, or click 'Upload New Image'.
Step 2 — Select AI Edit. Click 'AI Edit' in the left sidebar. A text input will appear below the image.
Step 3 — Write your prompt. Describe the change you want in plain English. Be specific — mention the subject, the desired change, the mood, and the quality.
Step 4 — Apply. Click 'Apply Edit'. The AI processes your image — this typically takes 10–20 seconds.
Step 5 — Compare. Use the Before/After toggle to compare the original with the edited version. If the result isn't quite right, refine your prompt and try again.
Step 6 — Download or continue editing. Download the result, or continue with another tool (upscale, resize, adjust) before downloading.
Real Examples of AI Edits
Here are prompt examples with their expected results:
'Replace background with a clean white studio background, soft shadows' → Ideal for e-commerce product shots.
'Add cinematic golden hour lighting, warm colour grade, lens flare on the right' → Great for portraits you want to make dramatic.
'Make this look like an old film photograph — faded colours, grain, light leak on the left' → Vintage aesthetic for social media.
'Replace the sky with dramatic storm clouds, darker moody atmosphere' → Landscape photography enhancement.
'Change the background to a modern coworking space with plants, natural light' → Professional context for headshots.
Frequently Asked Questions
How many credits does AI editing cost?Each AI Edit costs 2 credits. Free accounts get 10 credits on sign-up.
Can I undo an edit?Yes — JPT AI keeps your original image. Use the Before/After toggle to compare, and if you don't like the result, simply write a new prompt and try again.
Does it work on any image?AI editing works best on clear, well-lit photographs. Very small images (under 400px) or heavily compressed photos may produce lower-quality results. We recommend upscaling very small images first.
Can I make multiple edits to the same image?Yes — you can chain edits. Apply an AI background change, then adjust the colour with the Adjust tool, then upscale before downloading.
Is there a limit to what I can change?The AI can change anything it can see in the image. Large structural changes (moving objects, completely replacing the subject) work less reliably than changes to background, lighting, colour, and style.