How to Upscale an Image Without Losing Quality (2025 Guide)
Every pixel you stretch the traditional way makes your image blurrier. AI upscaling predicts real detail — here's how to do it right.
Zooming into a low-resolution photo and seeing a sea of blurry squares is one of the most frustrating experiences in digital photography. Traditional upscaling — whether in Photoshop, Preview, or any basic image editor — simply stretches existing pixels across a larger canvas. The result is the same blurry image, just bigger. AI upscaling solves this at the root level by predicting what real detail should look like and adding it back. This guide explains how it works and how to use it to get sharp, print-ready images every time.
Why Traditional Upscaling Fails
When you resize an image from 500px to 1000px using bicubic or bilinear interpolation — the standard algorithms in most editors — the software has to invent 75% of the pixels. It does this by averaging neighbouring pixels together, which creates a characteristic blurred, slightly waxy look. The image is larger, but not more detailed. Detail cannot be created from nothing this way — it can only be blurred.
The problem becomes critical in these situations:
- Print: A 150 DPI source image stretched to 300 DPI for A3 printing results in an unacceptably soft print.
- Hero banners: A thumbnail-sized source photo blown up to a full-width website banner looks unprofessionally blurry.
- Social media: Platforms like Instagram and LinkedIn compress images aggressively — starting with a larger, sharper source counteracts this compression.
How AI Upscaling Works
AI upscaling uses a type of neural network called a Super-Resolution Convolutional Neural Network (SRCNN) or, in more advanced systems, a Generative Adversarial Network (GAN). These models are trained on millions of high-resolution images and their deliberately down-sampled low-resolution versions.
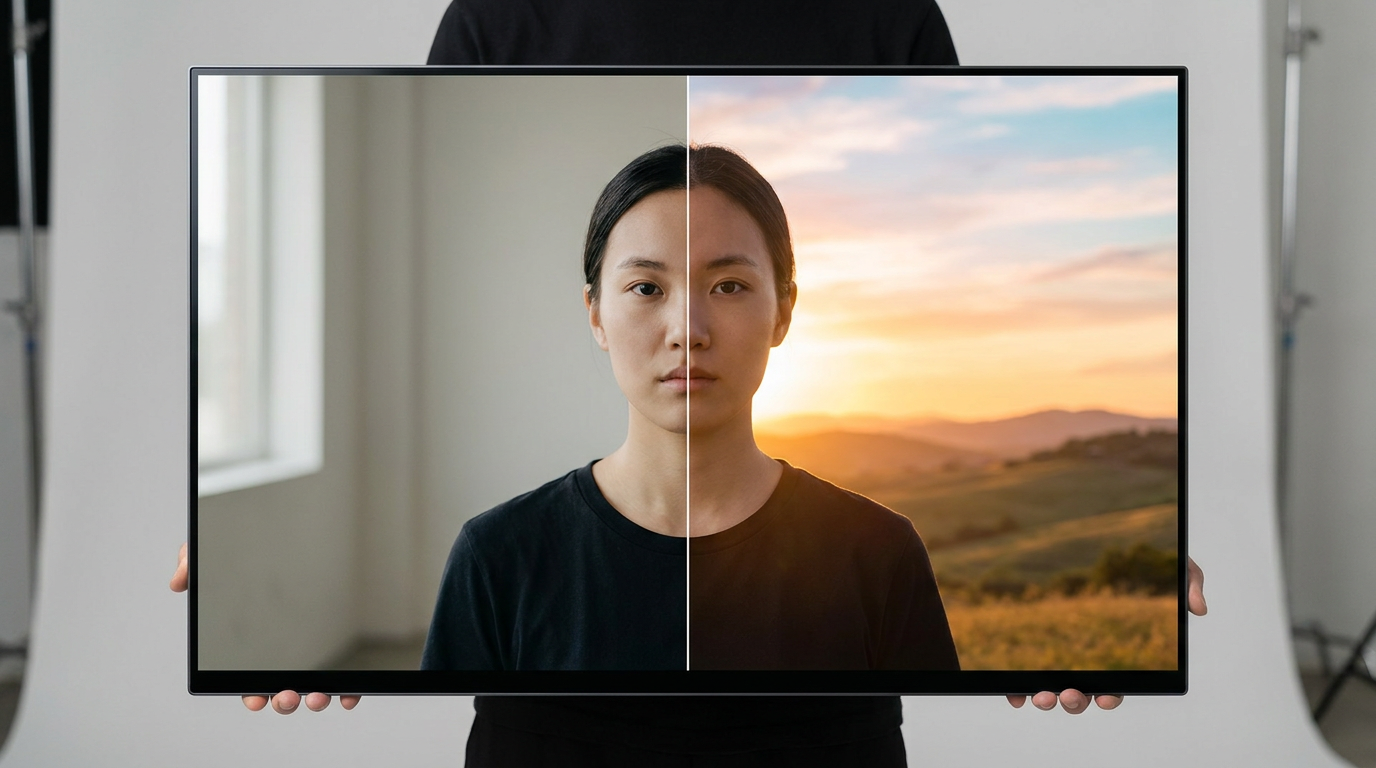
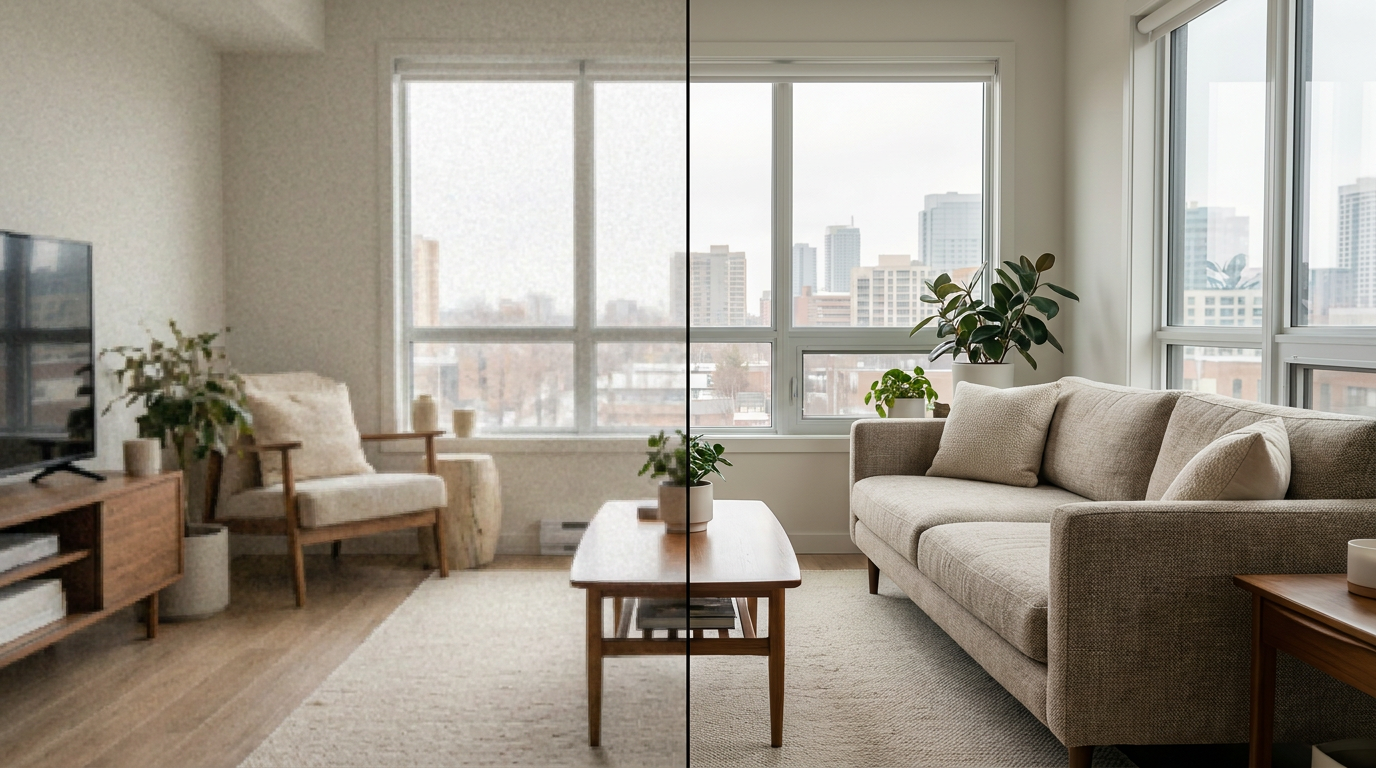
During training, the model learns to recognise patterns — the texture of skin, the weave of fabric, the sharpness of text edges, the fine veins in a leaf — and infer what those patterns should look like at higher resolution. When you feed it a low-resolution image, it doesn't stretch pixels. It reconstructs what a higher-resolution version of that image would realistically contain.
The practical result: edges sharper than the original, recovered fine detail, and natural-looking texture — at 2× or 4× the original dimensions.
Step-by-Step: Upscale an Image with JPT AI
Step 1 — Open the upscaler. Go to sjpt.io/upscale or click 'Upscale' in the left toolbar of the JPT AI editor.
Step 2 — Upload your image. Drag your JPG, PNG, or WEBP file onto the upload zone, or click 'Upload Image'. Maximum file size is 20 MB.
Step 3 — Choose your scale. Select 2× (doubles dimensions) or 4× (quadruples dimensions). For a 1000×1000px image, 2× produces 2000×2000px and 4× produces 4000×4000px.
Step 4 — Choose Normal or Pro AI. Normal upscale uses canvas super-resolution (1 credit, fast). Pro AI upscale uses PixelBin's advanced AI model (2 credits, highest quality with texture reconstruction).
Step 5 — Download. Click Download to save your enhanced image as a high-resolution JPEG or PNG.
When to Use 2× vs 4× Upscaling
Use 2× when:- Your source image is already reasonably sharp (800px+) and you just need a larger file for print or web.
- You're processing social media graphics that need to be 1080px or larger.
- You want faster processing and lower credit cost.
Use 4× when:- Your source image is small or low-resolution (under 500px).
- You're preparing an image for large-format print (A2, A1, or poster size).
- You need the highest possible resolution for a billboard, banner, or high-DPI display.
Note: 4× upscaling a 500×500px image produces a 2000×2000px result — roughly equivalent to a 4 megapixel photo, sufficient for most print applications.
Tips for Best Results
Start with the best source you have. AI upscaling amplifies what's already there. A sharp 500px image upscales better than a blurry 500px image.
Avoid heavy JPEG compression artefacts. If your source image has visible compression blocks, consider using the AI Edit tool first to smooth the image before upscaling.
Use PNG for graphics with text. Text elements benefit from lossless PNG output, which preserves crisp edges that JPEG compression would re-blur.
Chain tools for maximum quality. For old or damaged photos: Remove Noise → Upscale → Adjust for a full restoration workflow.
Frequently Asked Questions
Can AI upscaling make a 100px thumbnail look like a real 4K photo?No — AI upscaling can recover plausible detail but it cannot invent detail that was never there. A 100px thumbnail upscaled to 4× will look significantly better than a bicubic resize, but it will still show that it was originally a very small image. For best results, start from the largest available source.
Does JPT AI upscaling change colours?No — the upscaler preserves the original colour profile. The AI only adds spatial resolution (sharpness and detail), not colour grading.
How long does upscaling take?Normal (canvas) upscaling is instant. Pro AI upscaling typically takes 15–40 seconds depending on image size and server load.
Is there a free tier?Yes. Normal upscale is free and unlimited for everyone — no credits, no limits. Pro AI upscale costs 2 credits, with a free trial for new accounts.