Upscale Images for Large-Format Printing: Posters, Banners & Canvas
Sending a low-resolution image to a print shop is the fastest way to waste money on a blurry poster. Here's how to get print-ready resolution with AI.
You've found the perfect image for your poster, canvas print, or event banner — but the print shop keeps rejecting it for being too low-resolution, or worse, they print it anyway and deliver a blurry disappointment. The standard requirement for print is 300 DPI (dots per inch), which means a 20×30 inch poster needs a source image of at least 6000×9000 pixels. Most consumer photos fall far short of this. AI upscaling is the solution — but it needs to be done correctly to avoid artefacts at large scale.
Understanding DPI and Print Resolution
DPI (dots per inch) describes how many printed dots fit into one inch of the final output. The higher the DPI, the sharper the print.
300 DPI — Professional print quality. Required for photos, portraits, fine art, packaging.
150 DPI — Acceptable for large-format prints viewed from more than 1 metre (banners, posters, exhibition prints).
72–96 DPI — Screen resolution only. Never use for print.
To calculate the required pixel dimensions for your print:
Width (px) = Print Width (inches) × DPIExamples:
- A4 at 300 DPI = 2480×3508 px
- A3 at 300 DPI = 3508×4961 px
- A2 at 300 DPI = 4961×7016 px
- 24×36 inch poster at 300 DPI = 7200×10800 px
- 3×1 metre banner at 150 DPI = 17717×5906 px (high-quality CMYK file)
How Much Can AI Upscaling Help?
Let's look at realistic scenarios:
Scenario 1: Instagram photo for an A3 posterA typical Instagram photo is 1080×1080px. Upscaled 4× with Pro AI → 4320×4320px. At 300 DPI, that's a 14.4×14.4 inch print — close enough for a square A3 (11.7×16.5 inch) format with a small crop.
Scenario 2: Old 2MP photo for a 20×30 canvasA 2MP photo is approximately 1600×1200px. Upscaled 4× → 6400×4800px. At 300 DPI, that covers a 21×16 inch canvas — which with a slight crop fits a 20×16 canvas print perfectly.
Scenario 3: 800×600px source for a 60cm×40cm bannerAt 150 DPI (acceptable for banner material), 60cm×40cm = 23.6×15.7 inches = 3543×2362px required. Upscaled 4× from 800×600px → 3200×2400px — very close to the target, slightly under the width. A small additional 10% bicubic resize closes the gap.
Pro tip: For large format prints viewed from a distance (trade show banners, bus shelter posters, outdoor hoardings), 150 DPI is sufficient and often all that's needed. AI upscaling can often get you there from a reasonable source image.
File Format Recommendations for Print
TIFF or PNG — Best for print. Lossless formats that don't add compression artefacts. Preferred by professional print labs.
JPEG at 90–100% quality — Acceptable. JPEG compression at high quality settings is not visible in print. Avoid quality below 80%.
PDF — For designs with text or vector elements. If your print design has text, logos, or graphics layered over your photo, export as PDF from your design tool.
Colour mode — CMYK vs RGB: Screens work in RGB; printers work in CMYK. Professional print labs typically handle the conversion, but if you're submitting to a professional CMYK-only workflow, convert to CMYK in Photoshop or Affinity Photo before submission.
JPT AI exports in JPEG and PNG. For most print-on-demand services (Canvaspop, Printful, Gelato), PNG output from JPT AI can be uploaded directly.
Step-by-Step: Prepare an Image for a 20×30 Poster
Step 1 — Check your source image. Note the pixel dimensions. For this example: 1500×2000px.
Step 2 — Calculate target dimensions. 20×30 inches at 300 DPI = 6000×9000px. Your source needs to reach this.
Step 3 — Upscale 4× with Pro AI. 1500×2000px → 4× → 6000×8000px. This covers the 6000px width perfectly. Height at 8000px slightly short of 9000px.
Step 4 — Minor resize after upscaling. Use the Resize tool in JPT AI editor to bring the height from 8000px to 9000px (a 12.5% stretch — minimal quality impact).
Step 5 — Download as PNG. Use PNG for maximum quality before uploading to your print service.
Step 6 — Upload to your print lab. Services like Printful, Gelato, Canvaspop, or your local print shop will accept the PNG directly.
Frequently Asked Questions
Can AI upscaling replace a high-resolution original photo?Not entirely — an original high-resolution photo will always be superior. But for situations where a reshoot is impossible or impractical, AI upscaling is the best available alternative.
What's the maximum upscale size in JPT AI?JPT AI upscales up to 4× in a single operation. For very small source images needing very large prints, you can upscale twice — the output of the first upscale becomes the input for the second.
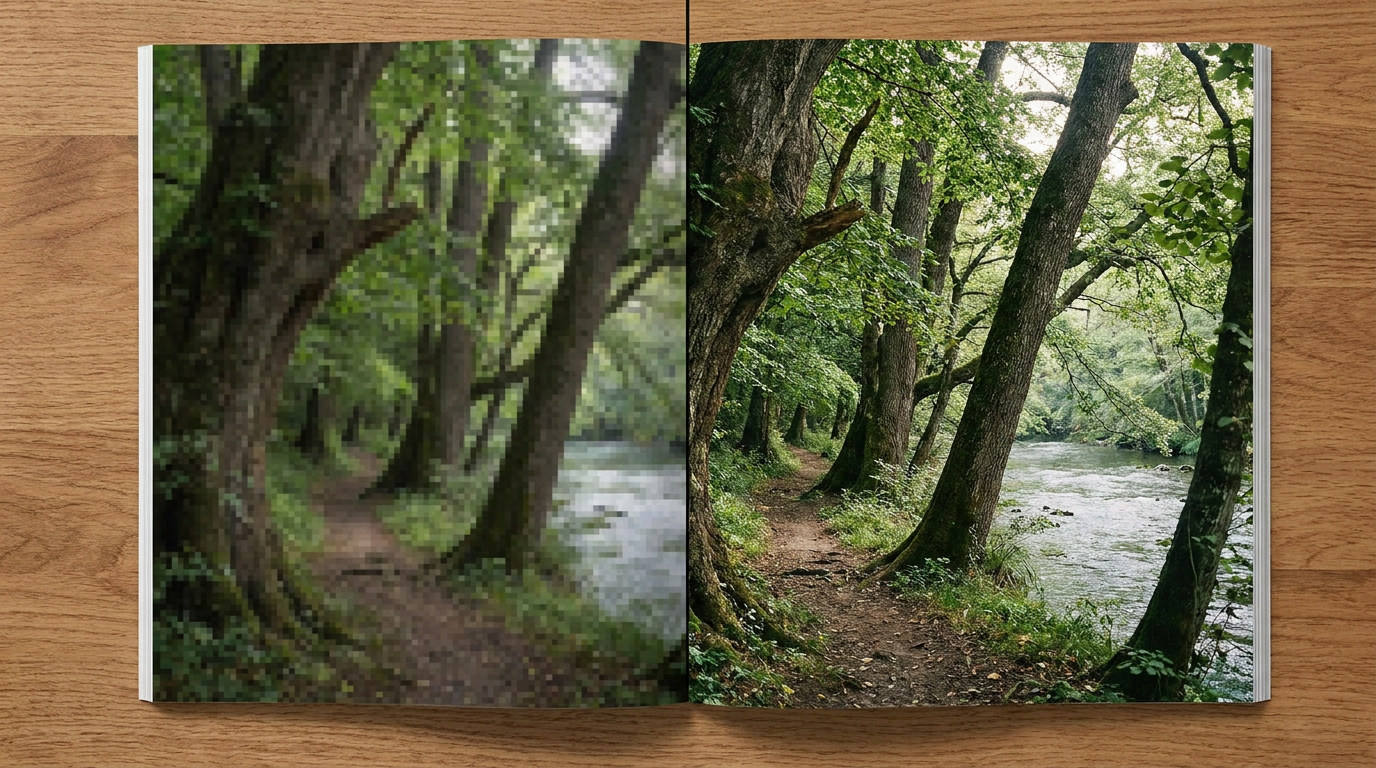
Will artefacts be visible at large print sizes?Pro AI upscaling produces clean results in most cases. Very heavily compressed source images may show residual compression patterns at very large print sizes. Always review the upscaled image at 100% zoom before sending to print.