How to Enhance Low Resolution Images with AI — Step-by-Step
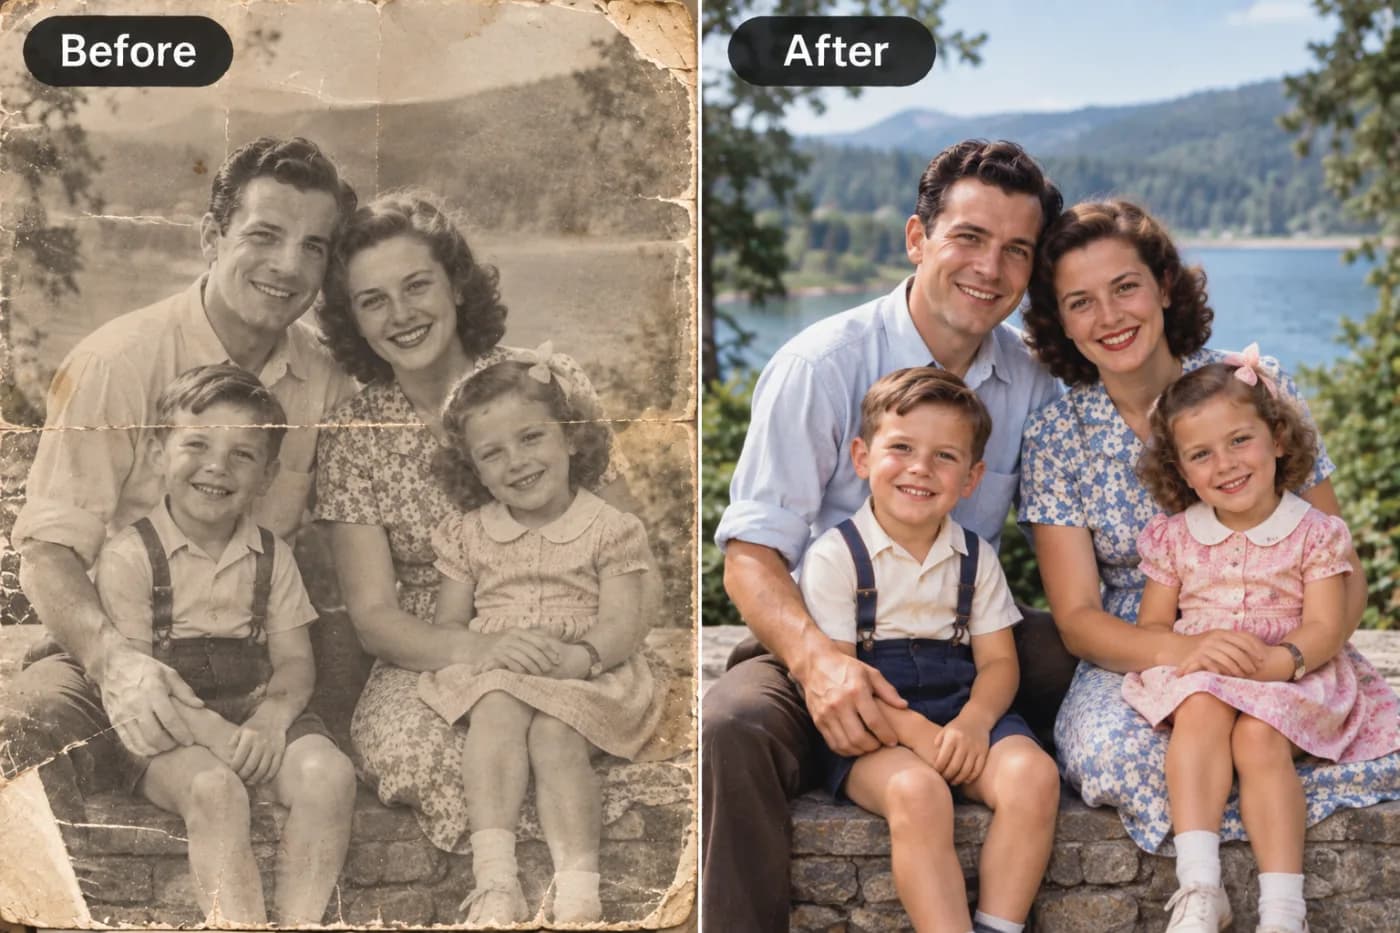
Low-resolution images look pixelated and unprofessional. Pixel Shine's AI enhancement can transform a grainy 240p photo into a crisp, usable high-resolution image.
Learning how to enhance low resolution images with AI can feel like magic the first time you see it work. A blurry, pixelated photo that looked hopeless suddenly becomes sharp, detailed, and usable — no manual retouching, no expensive software, just a few seconds of AI processing. If you've ever been stuck with a low-res image that's too small to print, too soft to post, or too blocky to use, this tutorial is exactly what you need.
Low-resolution images are everywhere: old screenshots, digitally zoomed phone shots, tiny thumbnails, compressed social media downloads, and scanned prints. Traditional editing can only stretch these so far before they fall apart into blur and jagged edges. AI upscaling is different — it intelligently reconstructs the missing detail, turning low res into high res convincingly. In this step-by-step tutorial, you'll learn exactly how AI fixes low-resolution images, how to use Pixel Shine's free upscaler, the settings that matter, and the tricks that produce the cleanest results. Whether it's a pixelated logo, a soft portrait, or a grainy old photo, you'll be able to enhance it for free.
Why Low-Resolution Images Look So Bad
To fix low-resolution images effectively, it helps to understand what "low resolution" actually means. Resolution refers to the number of pixels in an image. A photo that's 300x300 pixels has far less detail than one at 3000x3000, so when you enlarge the smaller image, each pixel gets stretched — producing the blocky, jagged look known as pixelation.
Low-res images come from many sources. Digital zoom on phones crops and enlarges pixels rather than capturing new detail, so zoomed shots are effectively low resolution. Screenshots are captured at screen resolution, which is often far below print standards. Thumbnails are deliberately tiny to load fast on web pages. And compression from messaging apps and social platforms strips away pixel data with every share, effectively lowering usable resolution.
The core problem is that traditional enlargement methods, like bicubic interpolation, can only guess at intermediate pixel values by averaging neighbors. They smooth the image but can't add real detail, which is why upscaled low-res photos look soft or blocky. This is precisely where AI changes everything: instead of averaging, it predicts what the missing detail *should* be, based on having studied millions of high-resolution images — reconstructing edges, textures, and features that interpolation simply can't.
How Pixel Shine Fixes Low-Resolution Images
Pixel Shine's upscaler uses deep-learning super-resolution to transform low-res images into high-res ones. Unlike traditional interpolation, which merely blurs the gaps, the AI has learned from vast datasets how real-world detail looks. When it encounters a pixelated edge or a soft texture, it reconstructs a plausible high-resolution version — sharpening lines, defining textures, and reducing the blocky artifacts that make low-res images unusable.
The Normal Upscaler handles this for free, with no sign-up and no usage limit. It's ideal for everyday low-res fixes: screenshots, social downloads, and moderately pixelated photos. For severely degraded images or ones needing maximum detail — like a very blurry portrait or a tiny product shot destined for print — the Pro AI Upscaler applies stronger reconstruction. It uses credits.
Every result downloads watermark-free at full resolution, which is essential when your whole goal is to gain usable resolution. Many free upscalers cap the output size or stamp a logo, defeating the purpose. Pixel Shine doesn't.
The tool typically supports upscaling factors like 2x and 4x, letting you multiply an image's dimensions while the AI fills in convincing detail. Everything runs online on desktop or mobile, processing most images in under 10 seconds — fast enough to fix a whole folder of low-res files.
Step-by-Step: Enhancing a Low-Resolution Image
Follow this tutorial to turn low res into high res:
1. Open Pixel Shine. Go to Pixel Shine and navigate to the upscale tool. It runs online — no download needed.
2. Upload the low-res image. Drag and drop your file or click to browse. JPG, PNG, and WebP are supported. The Normal Upscaler needs no account, so you can start right away.
3. Assess the source. Note how small or pixelated the image is. Very tiny sources (under ~100px) have limited recovery potential, while a few-hundred-pixel image will upscale beautifully.
4. Choose your mode. Use the free Normal Upscaler for typical low-res fixes, or the Pro AI engine for severely degraded images.
5. Set the scale factor. Pick 2x for a moderate boost or 4x for maximum enlargement. If the source is extremely small, start with 2x to keep results natural.
6. Run the upscale. Click enhance. In about 5–10 seconds, the AI reconstructs a high-resolution version and shows a before/after preview.
7. Review at full zoom. Check edges, text, and faces for natural detail. If it looks over-processed, drop to a lower scale or Normal mode.
8. Download. Save the high-resolution result — full res, no watermark. Store it in a high-quality format to preserve the gained detail.
Pro Tips for Enhancing Low-Res Images
Get cleaner low-res-to-high-res conversions with these techniques:
Start as large as possible. The bigger your source, the more the AI has to work with. If you have a larger original of a shared, compressed copy, use that instead.
Match scale to source size. A tiny 150px image often looks better at 2x than 4x, because extreme upscaling of minimal data invites artifacts. Larger sources can handle higher factors gracefully.
Use Pro for text and faces. Pixelated text and blurry faces need the strongest reconstruction. The Pro engine handles these far better than the Normal mode, so save your trials for them.
Fix, then resize down if needed. Sometimes upscaling to 4x and then scaling back down slightly in another tool produces an ultra-crisp result at your target size. This "upscale then downsize" trick sharpens fine detail.
Avoid re-compressing. After gaining resolution, don't undo it by saving as a low-quality JPG. Keep the file in high quality.
Test both modes on borderline images. For moderately pixelated photos, compare Normal and Pro. Sometimes Normal is enough and saves a trial; other times Pro's extra detail is worth it.
Common Mistakes to Avoid
Dodge these errors when enhancing low-res images:
Expecting perfection from microscopic sources. A 50x50px icon lacks the data to become a detailed poster. AI improves it, but there are physical limits to reconstruction. Set realistic expectations.
Over-scaling small images. Jumping straight to 4x or higher on a tiny source often produces smeared, artificial-looking detail. Start conservative and increase only if the result holds up.
Ignoring the subject type. Text, logos, and faces need stronger reconstruction than smooth backgrounds. Using the wrong mode for the subject leaves quality on the table.
Re-compressing the output. Gaining resolution then saving as a low-quality file reintroduces artifacts and wastes the enhancement. Always download and keep high quality.
Skipping the before/after check. The preview reveals whether the AI reconstructed detail accurately, especially in complex areas like patterned backgrounds or small text. Review before you download.
Real-World Use Cases
Enhancing low-resolution images solves problems in many situations:
Rescuing digitally zoomed photos. Shots taken with phone digital zoom are effectively low-res. AI upscaling recovers usable detail so the moment isn't lost.
Fixing screenshots for presentations. Screenshots pulled into slides or documents often look pixelated when projected or printed. Upscaling makes them crisp and professional.
Preparing tiny product images for listings. Sellers who only have small supplier images upscale them to meet marketplace minimum resolution requirements.
Restoring old scanned photos. Low-resolution scans of old prints become sharper and more detailed, ready for printing or framing.
Enlarging logos and graphics. Designers upscale small logo files or web graphics so they can be used at larger sizes without visible pixelation.
Advanced Low-Resolution Recovery Techniques
For the toughest low-res images, these advanced methods push results further.
Staged upscaling. Instead of jumping straight to 4x on a badly pixelated image, upscale to 2x first, review the result, then upscale that output again. Each stage gives the AI cleaner material to reconstruct from, often yielding better final detail than a single aggressive pass.
Upscale-then-downsample. Enlarge to a higher factor than you need, then scale the result down slightly to your target dimensions. This concentrates the reconstructed detail into fewer pixels, producing a noticeably crisper image — a classic trick for print-ready output.
Subject-specific mode selection. Reserve the Pro engine for the parts of your workflow that need it most: pixelated faces, small text, and intricate logos. Use the free Normal mode for smoother subjects where the extra power isn't necessary, conserving your trials.
Denoise before upscaling. If a low-res image is also grainy, a gentle first pass to reduce noise gives the upscaler cleaner edges to reconstruct, preventing it from amplifying noise into detail. Combining these techniques thoughtfully lets you recover usable, high-resolution images from sources that once seemed beyond saving — all with free and trial-based tools.
Who Needs Low-Resolution Enhancement
Low-resolution image enhancement serves anyone stuck with images that are too small or too pixelated to use.
E-commerce sellers upscale tiny supplier photos to meet marketplace resolution rules. Designers and marketers enlarge small logos, graphics, and client assets without pixelation. Content creators rescue digitally zoomed shots and compressed downloads for their feeds.
Students and professionals fix pixelated screenshots for slides, reports, and printed documents. Families and archivists restore low-resolution scans of old photographs. Real estate agents upscale small property images to display them larger. For all of them, the goal is the same: convert low res to high res convincingly, for free, without specialized software or a steep learning curve.
Frequently Asked Questions
Can AI really turn a low-resolution image into high resolution?Yes. AI super-resolution reconstructs missing detail based on patterns learned from millions of high-res images, producing genuinely sharper, more detailed results than traditional enlargement — not just a bigger, blurrier version.
How do I enhance a low-resolution image for free?Use Pixel Shine's Normal Upscaler at Pixel Shine. It's free, unlimited, and needs no sign-up. Upload your image, choose a scale factor like 2x or 4x, run the upscale, and download the high-res result with no watermark.
How much can I upscale a low-res image?Typically 2x or 4x. Larger sources handle higher factors well, while very tiny images look more natural at 2x. Over-upscaling minimal data can introduce artifacts.
Will upscaling fix a pixelated image?Yes. AI reconstructs the blocky pixelated areas into smoother, more detailed edges, dramatically reducing the pixelated look, especially with the Pro engine for severe cases.
Is there a limit on how many images I can enhance?No. The Normal Upscaler is unlimited and free. The Pro AI engine uses credits.
Does the enhanced image have a watermark?No. Pixel Shine downloads at full resolution with no watermark, which matters most when your goal is to gain usable resolution.
What's the smallest image I can enhance?There's no hard minimum, but very tiny sources (under ~100px) have limited recovery potential. A few hundred pixels on the short side gives the best results.
Does it work for text and logos?Yes. AI upscaling sharpens pixelated text and logos, with the Pro engine handling fine detail best. It's a common use for cleaning up small graphics.
Key Takeaways
Enhancing low-resolution images with AI turns pixelated, unusable photos into sharp, high-resolution results in seconds. Pixel Shine's free Normal Upscaler reconstructs real detail — not just bigger pixels — with no sign-up, no usage limit, and no watermark. For severely degraded images, the Pro engine adds stronger reconstruction.
Start from the largest source you have, match the scale factor to the image size, and reserve Pro mode for faces, text, and logos. With staged upscaling and the upscale-then-downsample trick, you can recover images that once seemed hopeless. Fix your first low-resolution image free at Pixel Shine.