How to Improve Photo Quality for Free — Complete AI Guide
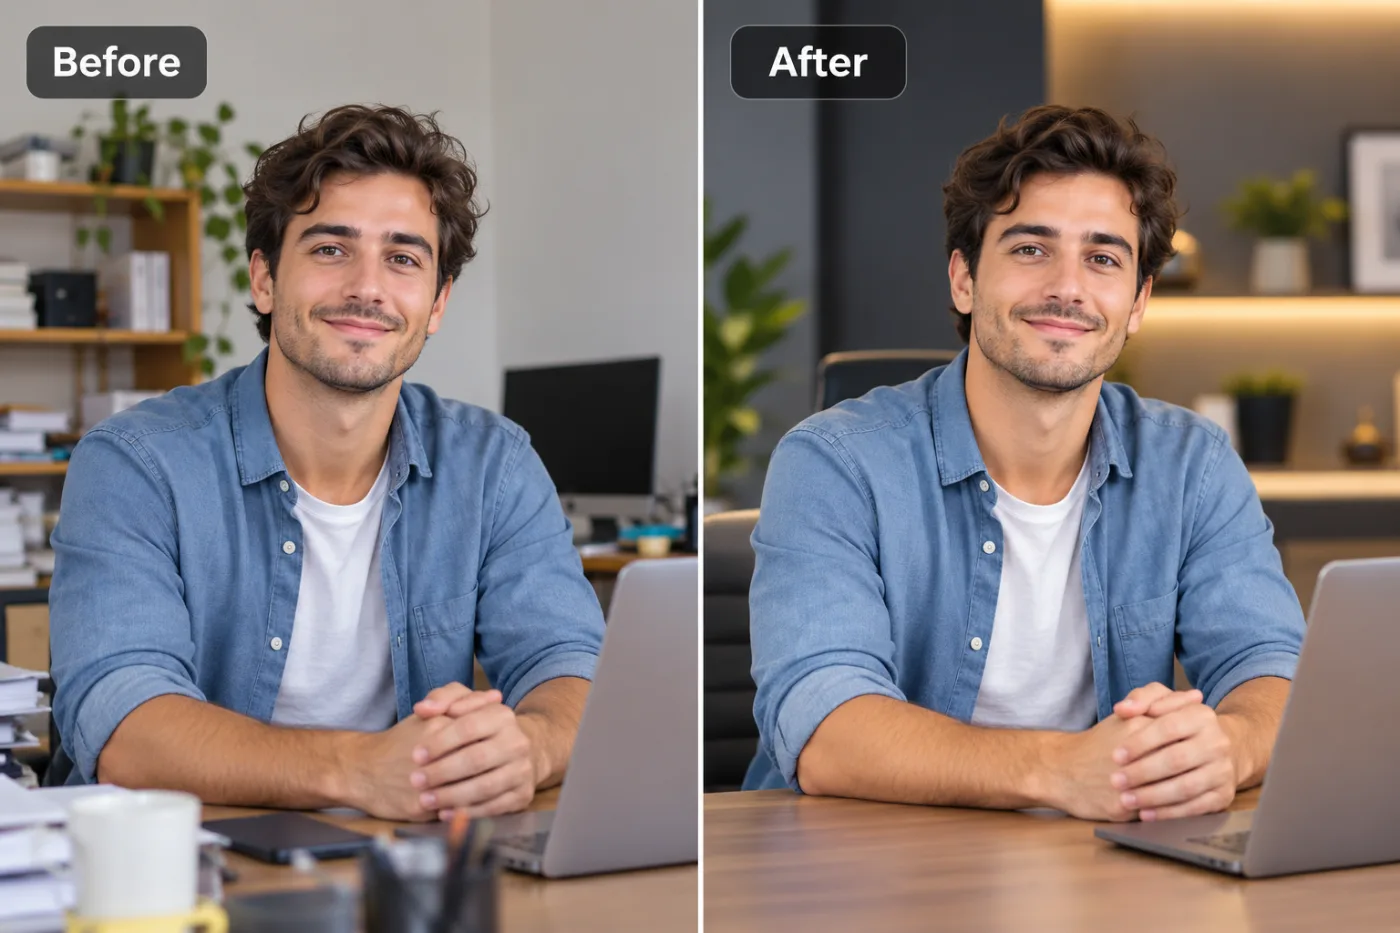
Improving photo quality doesn't have to cost anything. Pixel Shine's free AI-powered tools fix resolution, sharpness, and color in seconds — no expertise required.
Learning how to improve photo quality free used to mean either mastering complicated editing software or accepting blurry, pixelated results. Not anymore. AI photo enhancement has completely changed what's possible, letting anyone transform low-quality images into sharp, professional-looking photos in a matter of seconds — no experience, no subscription, and no watermark required.
Maybe you snapped a great moment but your phone camera struggled in low light. Maybe you're a seller who needs cleaner product shots, or you found the perfect old photo that's just too soft to print. Whatever the reason, this complete guide walks you through improving photo quality for free using AI. You'll learn why photos lose quality, how AI reconstructs missing detail, a precise step-by-step workflow, and the pro tricks that separate amateur results from professional ones. We'll also cover the mistakes that quietly ruin your images and how to avoid them. By the end, you'll have a reliable, repeatable process for making any photo look noticeably better — using Pixel Shine's free photo quality enhancer that works online.
Why Photos Lose Quality Over Time
Understanding what degrades a photo helps you improve it more effectively. The most common cause is compression. Messaging apps and social platforms shrink your images every time you send or upload them. A crisp original can lose more than 90% of its file size after a few shares, and with it goes real pixel detail.
Low-light capture is another major factor. When there isn't enough light, camera sensors amplify the signal, which introduces visible noise — those grainy, speckled patterns that make a photo look muddy. Cheaper sensors and older phones make this worse.
Digital zoom tricks people constantly. Zooming in before you shoot doesn't add detail; it just crops and enlarges existing pixels, so the result looks soft and blocky. Motion blur from a shaky hand or a moving subject smears fine detail that can't be restored by traditional means.
Finally, repeated editing and re-saving in lossy formats like JPG compounds the damage. Each save discards a little more data. For decades, fixing these problems meant painstaking manual work — noise reduction plugins, sharpening masks, and careful upscaling. AI now automates all of it, using learned patterns to rebuild the detail that was lost.
How Pixel Shine Improves Photo Quality
Pixel Shine tackles low-quality photos with deep-learning models trained on millions of high-resolution images. Rather than crudely stretching pixels, the AI analyzes and reconstructs what fine detail should look like — smoothing noise while sharpening genuine edges, so the result looks natural instead of artificially processed.
The platform gives you two options. The Normal Upscaler is free, unlimited, and needs no account. It's the everyday workhorse for improving social photos, screenshots, and general images. The Pro AI Upscaler uses credits and applies more powerful reconstruction, ideal for faces, fine text, and images that are heavily degraded.
Two things make Pixel Shine stand out among free tools. First, no watermarks — your improved photo downloads clean, at full resolution. Second, no mandatory sign-in for the Normal tier, so there's zero friction between you and a better photo. Many competing tools force registration or stamp a logo across your image.
Everything runs online on desktop or mobile, with no installation. Typical processing takes under 10 seconds, making it practical even when you have a batch of photos to fix.
Step-by-Step: How to Improve Photo Quality Free
Here's the exact workflow to make any photo look better:
1. Go to Pixel Shine. Open Pixel Shine and head to the photo enhancement / upscale tool. It works on any device — no app to install.
2. Upload your photo. Drag and drop the image or click to browse your files. JPG, PNG, and WebP are all supported. With the Normal Upscaler, you can begin instantly without creating an account.
3. Pick your enhancement mode. Choose the free Normal Upscaler for everyday improvement, or the Pro AI engine for maximum detail.
4. Select a scale factor. Choose 2x for social media and web use, or a higher factor if you plan to print or need extra resolution.
5. Enhance the photo. Click the enhance button. The AI processes your image in about 5–10 seconds and shows a before/after comparison.
6. Inspect the result. Zoom in on faces, edges, and textures. If anything looks over-smoothed, try a lower scale or switch to Normal mode for a more natural finish.
7. Download your improved photo. Save the final image at full resolution with no watermark. For best quality, keep it in a high-quality format rather than re-compressing it. In under a minute, you've turned a soft, low-quality shot into a crisp, share-ready photo — for free.
Pro Tips for Better Photo Quality
Push your results further with these expert tricks:
Always work from the original file. Enhancing a copy that's already been shared and compressed limits how much the AI can recover. Dig out the original from your camera roll whenever possible.
Enhance first, then edit. Run the photo through AI enhancement before applying color, crop, or contrast adjustments. Enhancing a high-detail version gives you cleaner material to work with.
Don't over-scale. More isn't always better. If a 2x result looks great, jumping to 4x can introduce an artificial, over-smoothed texture. Match the output size to where the photo will actually be viewed.
Reserve Pro mode for portraits and detail-heavy shots. Faces, hair, and small text benefit most from the Pro engine's stronger reconstruction. Use Pro AI strategically on images that truly need it.
Fix noise before printing. Grainy low-light photos improve dramatically with AI denoising. This matters most for print, where noise becomes far more visible than on a phone screen.
Compare modes on soft, artistic images. For dreamy or intentionally soft photos, the Normal mode sometimes preserves the mood better than aggressive Pro processing. Test both.
Common Mistakes to Avoid
Steer clear of these frequent errors:
Trying to rescue extremely tiny images. A 64x64px avatar simply doesn't contain enough data for convincing reconstruction. Start with the largest source you have — ideally several hundred pixels on the short side.
Cranking every image to maximum scale. Over-upscaling produces waxy skin and painted-looking textures. If your result looks unreal, reduce the scale factor.
Re-compressing after enhancement. Saving your improved photo as a low-quality JPG undoes some of the AI's work by reintroducing compression artifacts. Download and store it in high quality.
Layering heavy sharpening on top. Adding an aggressive sharpen filter after AI enhancement often creates ugly halos around edges. The AI already handles sharpening intelligently — trust it, then make only light tweaks.
Ignoring the preview. The before/after view exists for a reason. Occasionally the AI interprets a background or texture in an unexpected way. Catch it in the preview rather than after you've printed or posted the image.
Real-World Use Cases
Improving photo quality for free helps in countless everyday situations:
Everyday phone photos. That perfect candid shot ruined by low light or motion blur can be salvaged, so your best memories actually look their best.
Online selling. Marketplace sellers improve product photos to meet resolution standards and present cleaner, more trustworthy listings — which tends to lift conversions.
Social media and content. Creators sharpen and denoise phone shots so their feeds stay polished and consistent, helping posts perform better with the algorithm and audience alike.
Job applications and profiles. Professionals improve headshots and profile pictures so they look sharp and credible on LinkedIn, résumés, and company pages.
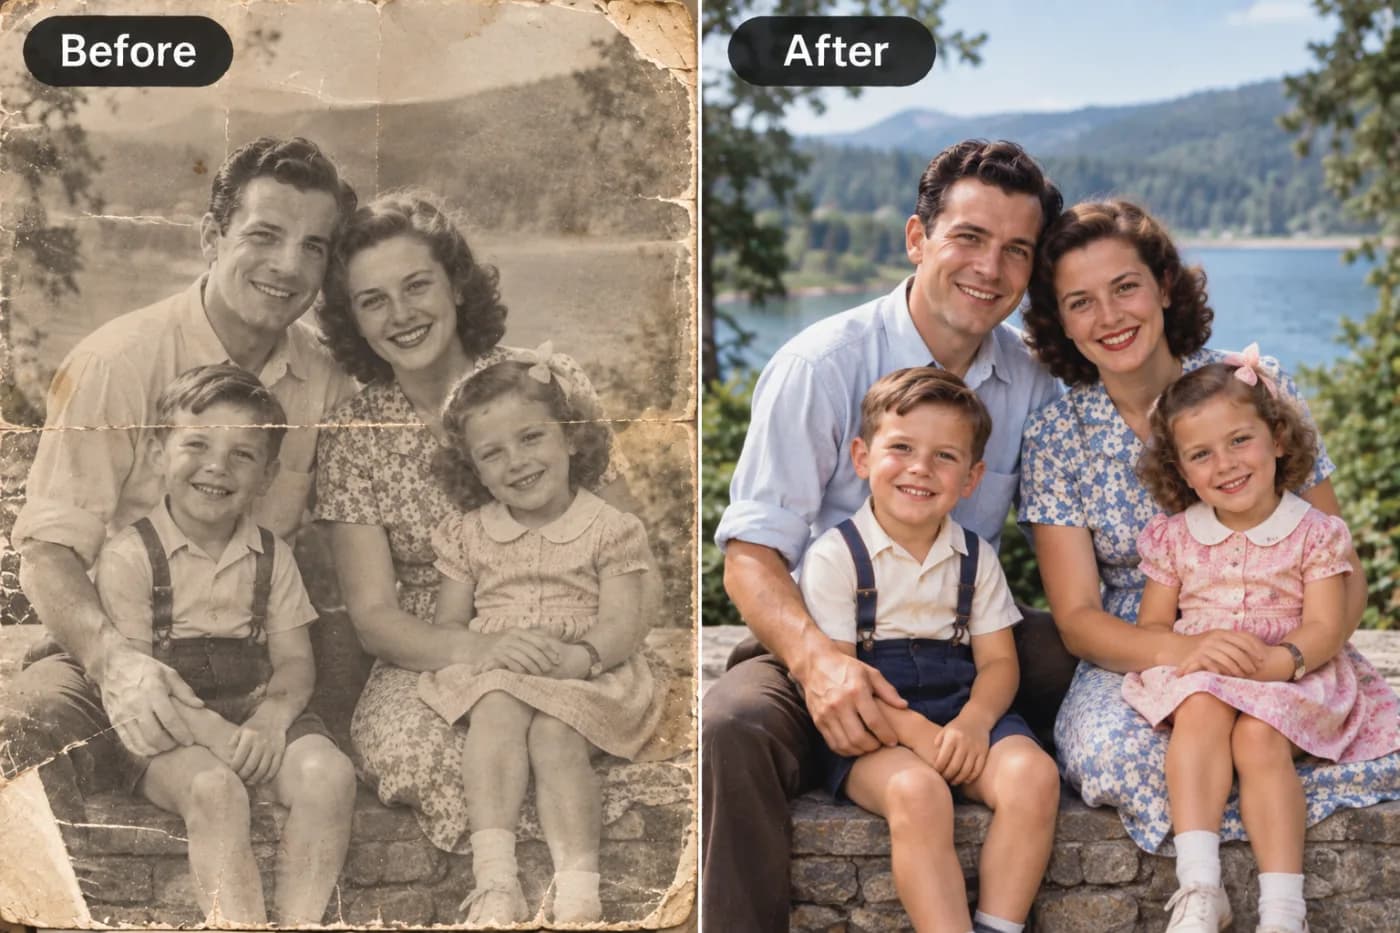
Preserving memories. Families enhance scanned prints and older digital photos before printing them for albums, frames, or gifts, giving faded images renewed clarity.
Advanced Techniques for Maximum Quality
Once you've mastered the basics, these advanced approaches squeeze out even more quality.
Two-pass enhancement. For very degraded images, first run a gentle Normal-mode pass to clean up noise, then a second pass to sharpen and upscale. This staged approach can produce cleaner results than one aggressive pass, because each step works on progressively better material.
Format-aware workflow. Start from PNG or a high-quality JPG whenever possible, and keep intermediate saves lossless. Only convert to a compressed format at the very end, once all enhancement and editing is complete. This prevents compounding compression damage.
Targeted mode selection. Different subjects respond differently to the AI. Portraits and text-heavy images shine with the Pro engine, while landscapes and general scenes often look completely natural with the free Normal Upscaler. Learning which mode suits which subject saves time and credits.
Resolution planning. Decide your final display size before enhancing. If a product image needs to be 2000px wide for a marketplace, calculate the scale factor that gets you there in one step rather than upscaling repeatedly, which can accumulate artifacts. Thoughtful planning consistently beats brute force, and it keeps your free enhancements looking professional every time.
Who Benefits Most from Free Photo Enhancement
Free AI photo improvement serves a broad audience.
Online sellers and small businesses rely on it to make product listings look professional without a photographer's budget. Content creators, bloggers, and social media managers use it to keep visuals crisp and engaging. Job seekers and professionals improve headshots for LinkedIn and applications.
Real estate agents brighten and sharpen property photos to attract buyers. Families and hobbyists restore old and scanned images to preserve memories. Students and educators clean up low-resolution images for presentations and printed handouts. What unites them all is a shared need: professional-looking photos, produced quickly and for free, without wrestling with complicated software or paying for a subscription they'll rarely use.
Frequently Asked Questions
How can I improve photo quality for free?Use an AI photo enhancer like Pixel Shine's Normal Upscaler. It's free, unlimited, and requires no sign-up. Upload your photo, choose a scale factor, click enhance, and download the sharper result with no watermark — all in about a minute.
Does AI actually make photos clearer or just bigger?Both. AI enhancement reconstructs fine detail and reduces noise while increasing resolution, so photos genuinely look clearer and sharper, not just enlarged.
Is Pixel Shine really free with no watermark?Yes. The Normal Upscaler is free and unlimited with no watermark and no forced login. The Pro AI engine uses credits.
Can I improve photo quality on my phone?Absolutely. Pixel Shine runs on your phone, so you can enhance photos directly from your phone without installing an app.
Will enhancing fix a blurry photo?AI can significantly reduce mild blur and sharpen soft images. Severe motion blur is harder to fully reverse, but the result is almost always noticeably better than the original.
What's the best format to upload and download?Upload the highest-quality version you have — PNG or a high-quality JPG. Download in a high-quality format and avoid re-compressing to preserve the improvement.
How long does it take to improve a photo?Most images process in about 5–10 seconds. The full workflow, including upload and download, usually takes under a minute.
Do I need editing skills to use it?No. The AI handles sharpening, noise reduction, and upscaling automatically. You just upload, choose a scale, and download — no experience required.
Key Takeaways
Improving photo quality for free is no longer a compromise. With Pixel Shine's Normal Upscaler, you can sharpen, denoise, and upscale any photo in seconds — no cost, no watermark, and no forced sign-up. For portraits, fine text, or heavily degraded shots, the Pro AI engine delivers even stronger results.
Remember the essentials: work from the best original, enhance before editing, avoid over-scaling, and always check the before/after preview. Whether you're selling products, posting content, or preserving family memories, a better photo is now just one click away. Try it yourself and improve your first photo free at Pixel Shine.