How to Change a Photo Background with AI (Free)
Want to swap a dull background for a studio, beach, or office scene? Just describe it and AI does the rest — here's how, for free.
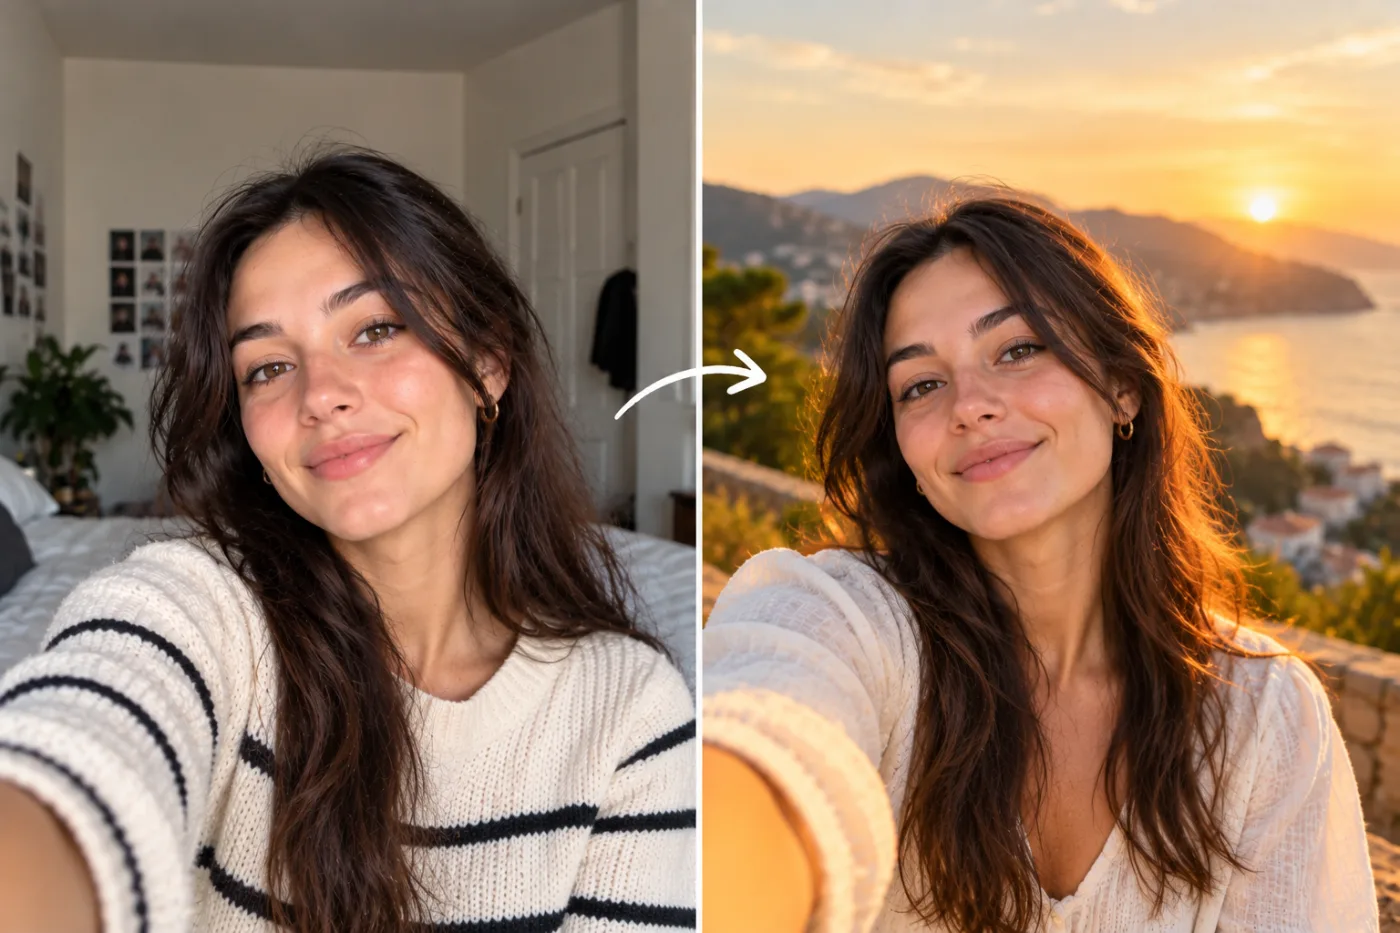
Learning how to change a photo background with AI for free opens up creative and practical possibilities that used to require Photoshop skills and hours of work. Whether you want to place yourself in front of a professional office backdrop, drop a product into a lifestyle scene, or transport a portrait to a beach at sunset, an AI background changer does the heavy lifting in seconds. Instead of manually cutting out your subject and compositing a new scene, you describe or select what you want and let the AI handle the blending.
The reason this used to be so hard is that convincing background swaps require two difficult things: a clean cutout of the subject (especially around hair and edges) and a new background whose lighting and perspective actually match. Get either wrong and the result looks obviously fake. In this guide, you'll learn how to change any photo's background with AI for free, the pro tips that make swaps look believable, the mistakes that give away a bad composite, and the real-world scenarios — from headshots to e-commerce — where AI background changing shines.
Why Changing Backgrounds Used to Be So Hard
Swapping a photo background convincingly has always been one of the trickiest jobs in image editing, for two big reasons. First is the cutout. To place a subject on a new background, you have to isolate them perfectly from the old one — and the hardest parts are exactly the ones that matter most: hair, fur, soft edges, and semi-transparent areas. A slightly off cutout leaves a halo of the old background or a hard, pasted-on outline that screams 'edited.'
Second is matching the new scene. Even with a perfect cutout, dropping a subject onto a new background looks fake if the lighting direction, color temperature, perspective, and shadows don't agree. A person lit from the left placed onto a scene lit from the right instantly looks wrong to the human eye, even if the viewer can't articulate why.
Traditionally, solving both meant expert Photoshop work: careful masking with channel or refine-edge techniques, then hours of manual color grading, shadow painting, and blending to make the composite believable. This required genuine skill and a lot of time — easily 30 minutes to an hour for a convincing result. That barrier put realistic background changes out of reach for most people. AI changes the equation by automating the cutout and, with prompt-based tools, generating or blending backgrounds that are designed to fit the subject naturally.
How Pixel Shine Changes Backgrounds for Free
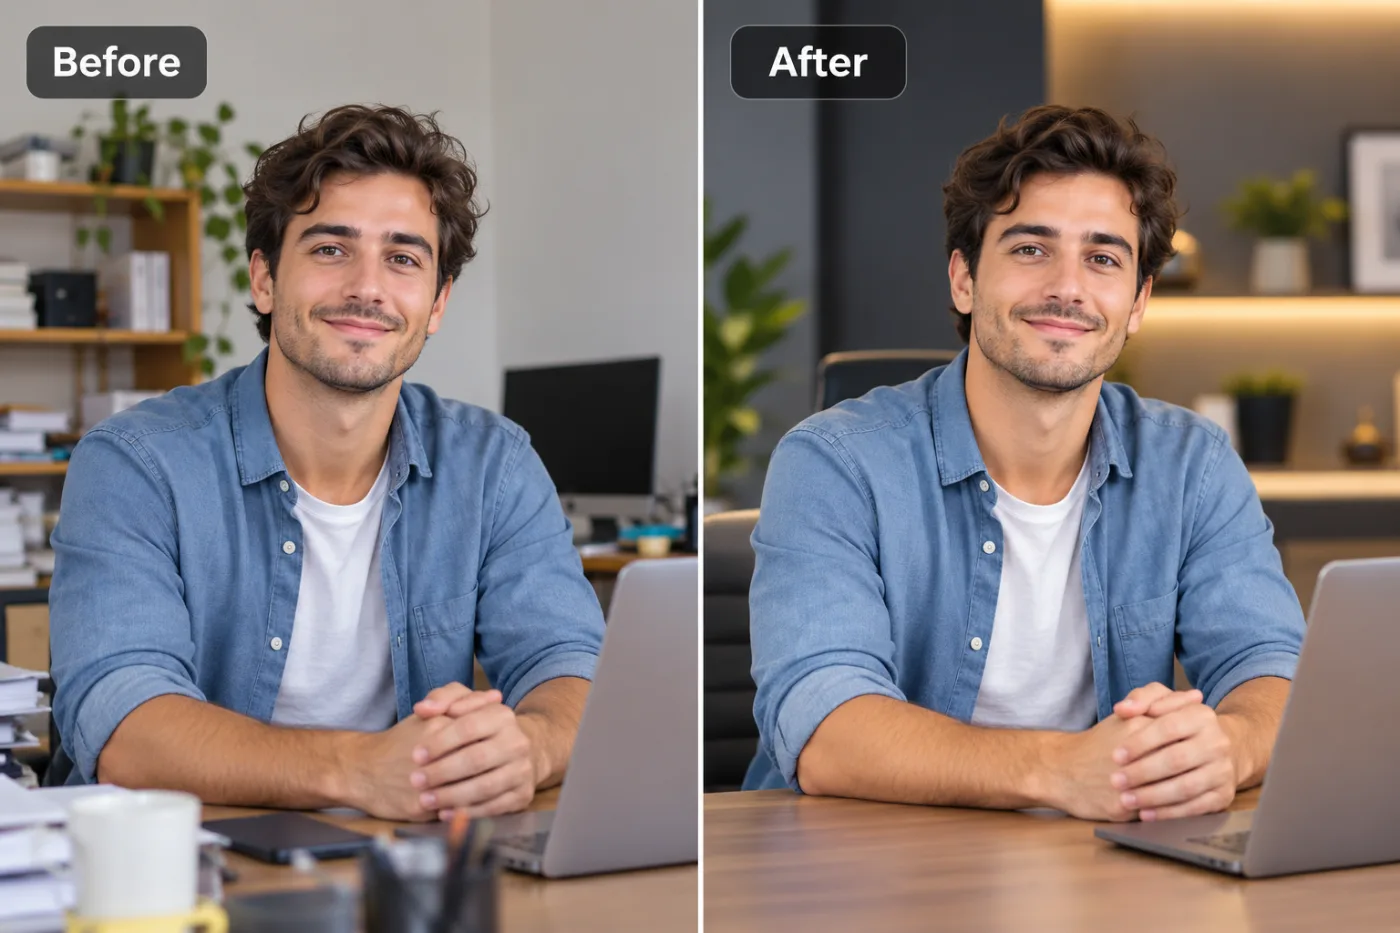
Pixel Shine gives you two complementary ways to change a background. For a straightforward swap to a solid color or a clean backdrop, the Background Remover isolates your subject in about five seconds, after which you drop in a new color or scene. For more creative or realistic changes, the AI Photo Editor lets you describe the background you want in plain text — 'a modern office,' 'a sunset beach,' 'a soft studio gray' — and the AI generates and blends it behind your subject.
The advantage of the prompt-based editor is that it handles the hard part — making the new background actually fit — rather than just pasting a stock image behind a cutout. You describe the scene, and the AI works to place your subject into it. This is far faster and more accessible than manual compositing, and it doesn't require any editing skill.
The practical perks make experimenting easy. Each swap costs 2 credits with no subscription, and downloads have no watermark. If your original photo is low-resolution, running it through the AI Upscaler first gives the AI more detail to work with, producing cleaner edges and a more convincing final composite. Between the two tools, you can go from a plain solid-color swap to a fully reimagined scene, all on one platform.
Step-by-Step: Change a Photo Background with AI
Here's how to swap a background convincingly.
1. Pick a photo with a clear subject. A well-lit image where your subject stands out from the current background gives the cleanest cutout. Upscale it first if it's small or soft.
2. Decide your approach. For a solid color or simple backdrop, use the Background Remover. For a realistic new scene, use the AI Photo Editor with a text prompt.
3. Open Pixel Shine. Go to Pixel Shine and choose the tool that fits — Remove Background for simple swaps, or the AI Editor for prompt-based scenes.
4. Upload your image. Drag and drop or browse. Higher resolution means better edges and a more believable result.
5. Remove or describe the background. With the remover, the AI isolates your subject automatically. With the editor, type a clear prompt describing the new background you want.
6. Review the composite. Check that the subject's edges are clean and the new background's lighting and perspective feel consistent with the subject.
7. Refine if needed. Adjust your prompt or try a different scene.
8. Download in full resolution. Export the finished image, watermark-free, ready for your headshot, listing, or social post.
Pro Tips for Believable Background Swaps
These tricks separate a convincing composite from an obvious one.
- Match lighting direction. Choose or describe a new background lit from the same side as your subject. A subject lit from the left on a scene lit from the right always looks off.
- Mind color temperature. A warm sunset background under a coolly-lit subject clashes. Pick scenes whose warmth or coolness roughly matches your subject's lighting for a natural blend.
- Start with a clean, high-res subject. The better your cutout, the more believable the swap. Upscale soft photos first so hair and edges resolve cleanly against the new scene.
- Be specific in your prompts. With the AI editor, detailed prompts ('softly blurred modern office with warm window light') produce better-fitting backgrounds than vague ones ('office').
- Iterate on a few versions. Don't settle for the first result. Try a few background variations and pick the one that blends most naturally.
- Consider depth of field. A softly blurred background often looks more realistic than a sharp one, because it mimics how portrait lenses render scenes and hides small edge imperfections.
Common Mistakes to Avoid
Avoid these errors that give away a fake background.
Mismatched lighting. The single biggest tell is a subject and background lit from different directions or in different color temperatures. Always match the light before finalizing.
A sloppy cutout around hair. Halos and hard edges around the head ruin the illusion. Use a photo with good hair-background contrast, and upscale low-res images so the AI captures fine strands.
Choosing an unrealistic scale or perspective. Placing a subject into a scene where the perspective doesn't match — like a straight-on portrait dropped into a scene shot from below — looks wrong. Pick backgrounds with a compatible viewpoint.
Over-sharp backgrounds behind a portrait. A tack-sharp background behind a person rarely looks natural for a portrait. A gentle blur usually reads as more realistic and hides edge flaws.
Ignoring shadows. Real subjects cast shadows. A subject floating with no grounding shadow can look pasted-in; choosing scenes and framing that don't demand an obvious cast shadow keeps the composite believable.
Real-World Use Cases for AI Background Changing
AI background swaps solve problems across work and life.
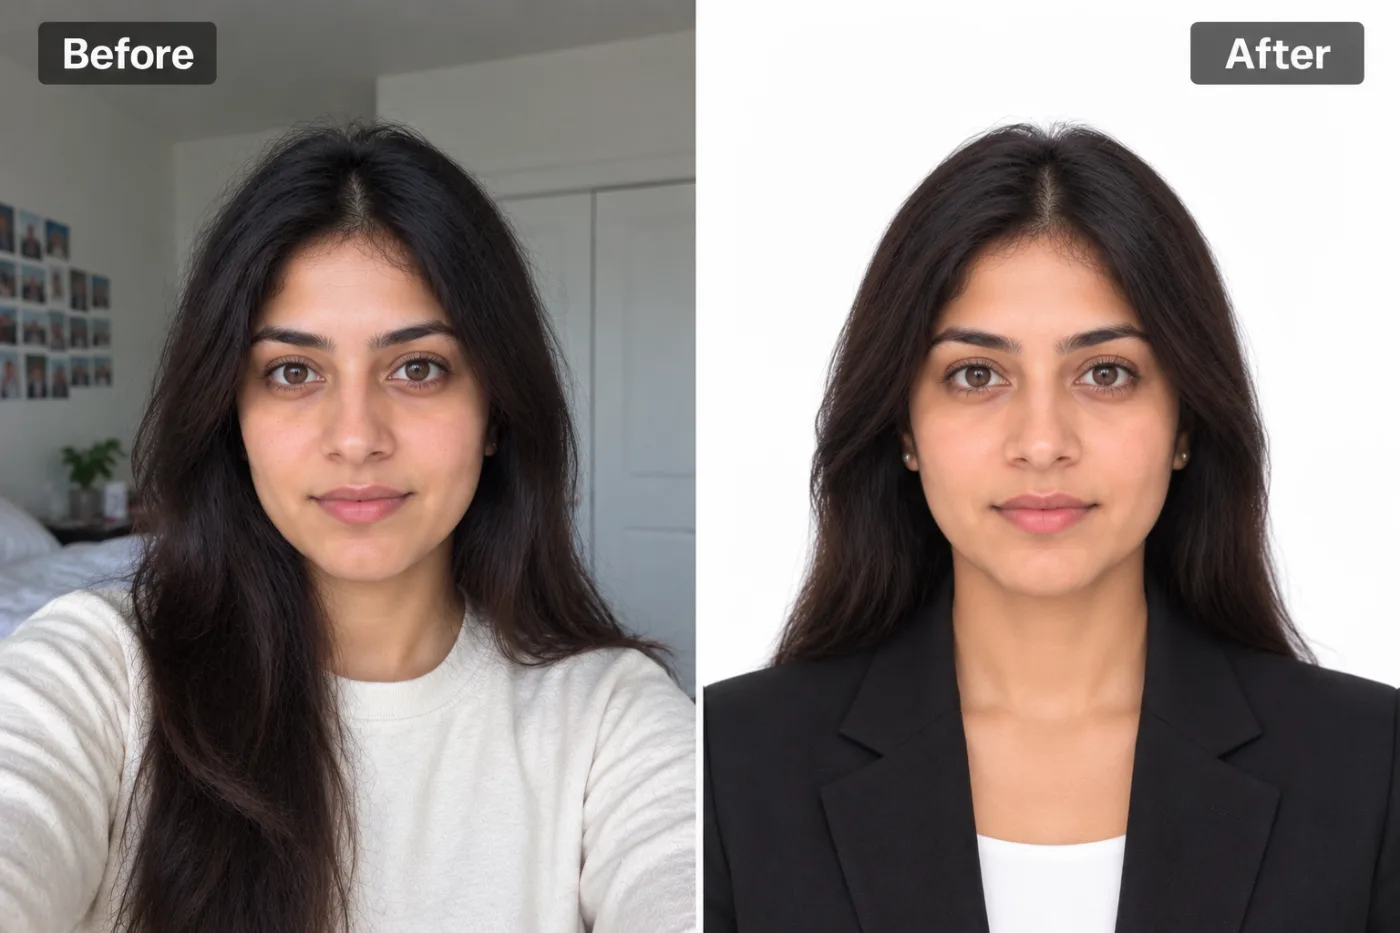
Professional headshots get an instant upgrade: swap a messy home background for a clean studio gray or a modern office, turning a casual selfie into a LinkedIn-ready portrait.
E-commerce and product shots move products from a plain surface into lifestyle scenes — a mug on a cozy café table, a candle in a styled living room — to make listings more appealing.
Real estate and rentals occasionally use background enhancement to improve dull or cluttered surroundings in supporting photos (while keeping listing photos honest).
Social media content lets creators transport themselves to travel destinations, seasonal scenes, or branded backdrops for eye-catching posts without leaving home.
Team and remote-work photos standardize everyone onto a consistent background so a company's staff page looks cohesive, even when headshots were taken in different places.
Prompt-Based Editing vs. Manual Compositing
How does AI background changing compare to doing it by hand? Manual compositing in Photoshop offers ultimate control — you can perfect every edge, hand-paint shadows, and color-grade the subject to match the scene pixel by pixel. But it requires real skill and often 30 to 60 minutes per image, plus a paid subscription. For most people, that's a nonstarter.
Stock-image compositing (cutting out a subject and pasting a downloaded background behind it) is faster than full manual work but still leaves you matching lighting and perspective yourself, and a mismatched stock scene looks obviously fake.
Prompt-based AI editing flips the workflow: instead of hunting for a background and forcing it to fit, you describe what you want and the AI generates a scene designed to blend with your subject. It's dramatically faster — seconds instead of an hour — and needs zero editing skill.
The honest trade-off: for a high-stakes hero image demanding pixel-perfect control, a skilled artist still has the edge. But for the vast majority of headshots, product shots, and social posts, AI delivers a believable swap in a fraction of the time and cost. Try a few variations, and you can find a great result without touching a mask or a layer.
Who Uses AI Background Changing and Why
Job seekers and professionals swap casual backgrounds for clean, professional ones to create LinkedIn and resume headshots that look studio-shot without hiring a photographer.
Online sellers and marketers move products into appealing lifestyle scenes to make listings and ads more persuasive and on-brand.
Content creators and influencers change backgrounds to fit themes, seasons, or campaigns, keeping their feeds fresh without traveling or renting locations.
Small businesses and remote teams standardize staff photos onto a uniform background for a polished, cohesive company website.
Everyday users clean up distracting or embarrassing backgrounds in personal photos before sharing them. Across all these users, the goal is the same: get a clean, believable new background quickly and for free, without needing Photoshop skills or a studio.
Frequently Asked Questions
How do I change a photo background with AI for free?Upload your photo to Pixel Shine at Pixel Shine. For a simple swap, use the Background Remover to isolate your subject and add a new background. For a realistic new scene, use the AI Photo Editor and describe the background you want.
Is the AI background changer really free?Both tools run on credits rather than a subscription: 2 credits per generation, with no watermark on downloads.
Can I put myself in a completely different scene, like a beach?Yes. Using the AI Photo Editor, you describe the scene in plain text — such as 'a sunset beach' — and the AI generates and blends that background behind you, rather than just pasting a flat image.
Why does my background swap look fake?Usually because the lighting direction or color temperature of the new background doesn't match your subject, or the cutout around the hair is rough. Match the lighting, use a high-contrast, high-res photo, and consider a softly blurred background.
Does it handle hair and fine edges?Yes. The AI is built to preserve soft edges like hair when isolating your subject, which is what keeps a background swap looking natural instead of pasted-on.
What if my photo is low resolution?Run it through Pixel Shine's Upscaler first. More detail gives the AI cleaner edges to work with, resulting in a more believable composite against the new background.
Can I use this for professional headshots?Absolutely. Swapping a messy home background for a clean studio or office backdrop is one of the most popular uses, turning a casual photo into a polished, LinkedIn-ready headshot.
Do I need any editing skills?No. For simple swaps you just upload and pick a background; for scenes you describe what you want in words. There's no masking, layering, or software to learn.
Key Takeaways
Changing a photo background with AI for free is fast, skill-free, and surprisingly convincing. Use the Background Remover for clean solid-color or simple swaps, and the AI Photo Editor's text prompts for realistic new scenes. The secrets to a believable result: match the lighting direction and color temperature, start with a high-resolution photo (upscale soft ones first), keep hair edges clean, and iterate to find the best fit.
Ready to reinvent your photos' backgrounds? Head to Pixel Shine, upload your image, and change the background in seconds — watermark-free, no subscription.