Free 4K Image Upscaler — AI Tool for Ultra-HD Photo Quality
A free 4K image upscaler that actually delivers: Pixel Shine uses AI super-resolution to enlarge any photo to near-4K quality with genuine detail improvement.
A free 4K image upscaler is one of the most useful tools you can have in your kit if you regularly work with photos, design, or content for high-resolution screens. As 4K displays, TVs, and premium print become the norm, images that were perfectly acceptable a few years ago now look soft and undersized when shown at full ultra-HD scale. The demand for a reliable AI 4K image enhancer that can bridge that gap — for free — has never been higher.
The problem is that raw enlargement doesn't work. Stretching a 1080p image to 4K with a basic tool just spreads the pixels thinner, giving you a bigger but blurrier result. True 4K clarity requires AI super-resolution: technology that reconstructs fine detail as it enlarges, producing an image that's genuinely sharp at ultra-high definition.
In this guide, we'll break down how a free 4K upscaler online should work, why Pixel Shine stands out with unlimited Normal upscaling, no watermarks, and no forced sign-up, and how to use it to upscale to 4K free. We'll also cover expert tips, common mistakes, and the real-world scenarios where ultra-HD upscaling makes a visible difference. If you want your images to look their best on 4K screens and large prints, this is your complete playbook.
Why You Need a Dedicated 4K Upscaler
Not all enlargement is created equal, and 4K raises the bar considerably. 4K is a demanding target. At 3840x2160 pixels, a 4K frame holds around 8.3 million pixels — four times a 1080p image. Filling that space convincingly requires a lot of genuine detail.
Most images fall well short. Photos downloaded from social platforms are heavily compressed, often arriving at 1080 pixels wide or less. Older cameras and phones captured images below 4K. And every crop you make discards pixels, pulling resolution even lower. Place any of these on a 4K screen and the softness is immediately visible.
Generic resizers can't help. The resize functions in your operating system or basic web tools use interpolation — they average neighboring pixels to fill the enlarged space. That hits the 4K pixel count but produces blur, not detail. You end up with an image that's technically 4K-sized yet visibly soft.
Ordinary upscalers often disappoint too. Many so-called AI tools are just interpolation with marketing on top, or they gate real quality behind watermarks and subscriptions. A dedicated 4K upscaler built on genuine deep-learning super-resolution is what actually delivers ultra-HD sharpness — reconstructing edges, textures, and surfaces rather than merely spreading pixels. That's the capability that makes the difference between a 4K image that impresses and one that looks stretched.
How Pixel Shine's 4K Upscaler Works
Pixel Shine's 4K image upscaler is powered by genuine AI super-resolution, engineered to lift undersized images into ultra-HD territory with real reconstructed detail. When you upload an image, the deep-learning model analyzes its content — edges, textures, patterns, faces — and predicts the high-resolution detail that should exist at 4K scale, drawing on training across millions of image pairs.
Hitting 4K through upscale factors. A 4x enlargement turns a 1000x563 image into 4000x2252, comfortably past 4K width. A 2x pass takes a 1920-pixel source to exactly 3840 — precise 4K width. You choose the factor that lands you at ultra-HD.
Free Normal mode covers the bulk of 4K needs: wallpapers, display images, and general enhancement — free, unlimited, and with no sign-up. For the toughest jobs — detailed portraits, degraded originals bound for large 4K print — Pro AI mode applies a stronger, credit-based model that maximizes detail recovery.
Clean output, no gatekeeping. Pixel Shine never watermarks results and requires no account for Normal upscaling, so your 4K-ready file is immediately usable for wallpapers, client work, and print. The result is a free 4K image enhancer that behaves like professional software: real reconstruction, clean files, and none of the friction that makes other free upscalers frustrating.
Step-by-Step: Using the Free 4K Upscaler
Follow these steps to upscale any image to 4K with Pixel Shine.
1. Open Pixel Shine and go to the Upscale tool. The free Normal 4K upscaler requires no account, so you can begin instantly.
2. Note your image's current size. Check the width and height. To reach 4K, aim for a final long side of about 3840 pixels or more.
3. Upload your image. Drag it into the upload zone or click to browse. JPG, PNG, and WEBP are supported directly.
4. Pick the factor that reaches 4K. For a source near 1000 pixels wide, choose 4x to land around 4000 pixels. For a 1920-pixel source, 2x hits exactly 3840 — full 4K width.
5. Choose Normal or Pro AI mode. Use free Normal for unlimited everyday 4K upscaling. Switch to Pro AI mode for critical portraits or degraded images headed to large print.
6. Run the upscale. Click the button and let the AI reconstruct detail. Processing usually completes in seconds.
7. Confirm the 4K output. Zoom in to check that edges and textures are crisp and that dimensions meet your 4K target.
8. Download the ultra-HD file. Save the clean, watermark-free 4K image to your device, ready for high-resolution screens, wallpapers, or print.
Pro Tips for Ultra-HD Quality
These expert habits help you squeeze the most out of a 4K upscaler.
Overshoot 4K slightly, then crop. If a factor gets you to 4100 pixels wide, keep that headroom and crop to exact 4K dimensions — this preserves maximum sharpness rather than forcing a later stretch.
Feed it the cleanest source. A larger, less-compressed original gives the AI more real detail to build on, yielding a far more convincing 4K result than a tiny thumbnail.
Choose Pro AI mode for 4K faces. At ultra-HD, portraits are viewed closely and unforgivingly. The more powerful model handles skin, hair, and eyes much better for large-format display.
Plan for 16:9. 4K screens are 16:9. If your image differs, decide your crop strategy so the final ultra-HD image fills the display without distortion.
Upscale first, edit second. Do the 4K enlargement before color grading so your adjustments apply to the full reconstructed image.
Verify fine detail at full zoom. For graphics or images with text destined for 4K, confirm small elements stayed sharp rather than softening during the upscale.
Common Mistakes to Avoid
Avoid these errors to keep your 4K output clean and professional.
Pushing a tiny image to 4K. Upscaling a 200-pixel image to 4K forces the AI to invent massive detail. It'll improve the image, but expectations should scale with the source — start as large as possible.
Re-processing an already-compressed download. Social media images are pre-compressed; upscaling them repeatedly compounds artifacts. Always work from the cleanest version you can find.
Ignoring aspect ratio. Stretching a non-16:9 image to fill a 4K screen distorts the subject. Upscale proportionally, then crop to 16:9.
Using Normal mode on heavily degraded print sources. For large 4K prints from noisy or old images, Pro AI mode's stronger reconstruction pays off, whereas Normal may leave visible noise at that scale.
Trusting the thumbnail preview. Small previews hide flaws that jump out on real 4K screens. Download and inspect the full-resolution file at 100% before you use it anywhere.
Real-World Uses for a 4K Upscaler
A free 4K upscaler proves its value across many high-resolution scenarios.
4K wallpapers. Transforming a beloved photo or artwork into a crisp ultra-HD wallpaper needs enough pixels to fill 4K monitors and phones without softness — exactly what upscaling supplies.
Large prints. Posters, canvases, and gallery photos demand high pixel counts to stay sharp at size. Upscaling a modest image to 4K-plus first ensures professional print quality.
4K video projects. Editors working in ultra-HD need stills that hold up at 4K. Upscaling images keeps backgrounds, b-roll, and overlays crisp on the timeline.
Digital signage. Businesses running 4K screens for menus and ads need source images that fill the panel sharply, which a good upscaler delivers.
Premium product pages. High-end e-commerce increasingly uses large, zoomable 4K imagery. Sellers upscale their best shots to meet that standard and give shoppers detailed close-ups that build confidence.
Pixel Shine vs. Other 4K Upscalers
Here's how Pixel Shine compares to the alternatives when your target is 4K.
Versus basic resizers, Pixel Shine wins decisively. Those tools reach 4K dimensions through interpolation, but the result is soft — 4K in size only. Pixel Shine reconstructs genuine detail for true ultra-HD sharpness.
Versus watermark-and-subscription upscalers, Pixel Shine's free Normal tier is actually free and actually clean: no logo on your image, no forced account, no one-image demo. That makes the 4K output usable for real projects immediately.
Versus paid desktop apps like Topaz Gigapixel, Pixel Shine offers the same class of AI super-resolution without the upfront purchase, heavy install, or hardware requirements — everything runs online.
Versus other online AI tools, Pixel Shine's combination of unlimited free Normal upscaling and a powerful credit-based Pro AI mode for the hardest 4K jobs gives you both an accessible everyday path and a professional ceiling. For anyone who needs genuine 4K enhancement without cost or complexity, that balance is hard to beat.
Who Uses a Free 4K Upscaler
The users reaching for a 4K image upscaler come from every visual discipline. Wallpaper and design fans enlarge images to fill 4K monitors and phones crisply. Photographers and print sellers upscale to 4K-plus for posters, canvases, and gallery prints that stay sharp. Video editors and content creators boost stills to match 4K timelines and backgrounds.
Marketers and businesses prepare ultra-HD imagery for 4K signage, ads, and premium web pages. E-commerce sellers upscale product photos for detailed, zoomable 4K views. Presenters and educators ensure images on 4K displays look polished, not pixelated. In every case, the objective is identical: satisfy the heavy pixel demands of modern ultra-HD screens and large print with images that look truly sharp — without paying for expensive software or accepting a soft, stretched result that undermines the whole point of going 4K.
Compression vs. Upscaling: What Each Does to Quality
To choose correctly, you first need to understand what these operations really do to the pixels in your image.
Compression reduces file size. There are two kinds. Lossless compression (like PNG) shrinks the file with zero quality loss by storing data more efficiently. Lossy compression (like JPEG) achieves much smaller files by discarding detail your eye is less likely to notice, but push it too far and you get visible blocky artifacts, halos around edges, and muddy detail.
Upscaling increases dimensions and, with AI, adds detail. Basic upscaling (bicubic resizing) just stretches existing pixels, making an image larger but blurrier. AI upscaling is fundamentally different: it reconstructs believable new detail as it enlarges, producing a bigger image that's actually sharper, not softer.
Resolution vs. file size are different things. A common confusion: resolution is how many pixels the image contains (e.g. 2000x1500), while file size is how many bytes it takes to store (e.g. 800 KB). You can have a high-resolution image with a small file size (well compressed) or a low-resolution image with a large file size (poorly compressed).
Quality is the perception of detail and clarity. Both operations affect perceived quality: over-compression destroys it, while AI upscaling can restore or enhance it. Knowing which lever to pull depends entirely on your goal, size or sharpness.
Going Beyond 4K
Sometimes you need to go beyond a single 4K pass, and a few advanced approaches help.
Staged upscaling for extreme sizes. If you need output well beyond 4K — say for a large banner — running two 2x passes can sometimes yield smoother results than one aggressive jump, because each step gives the model a more manageable reconstruction task. Start from your cleanest source each time.
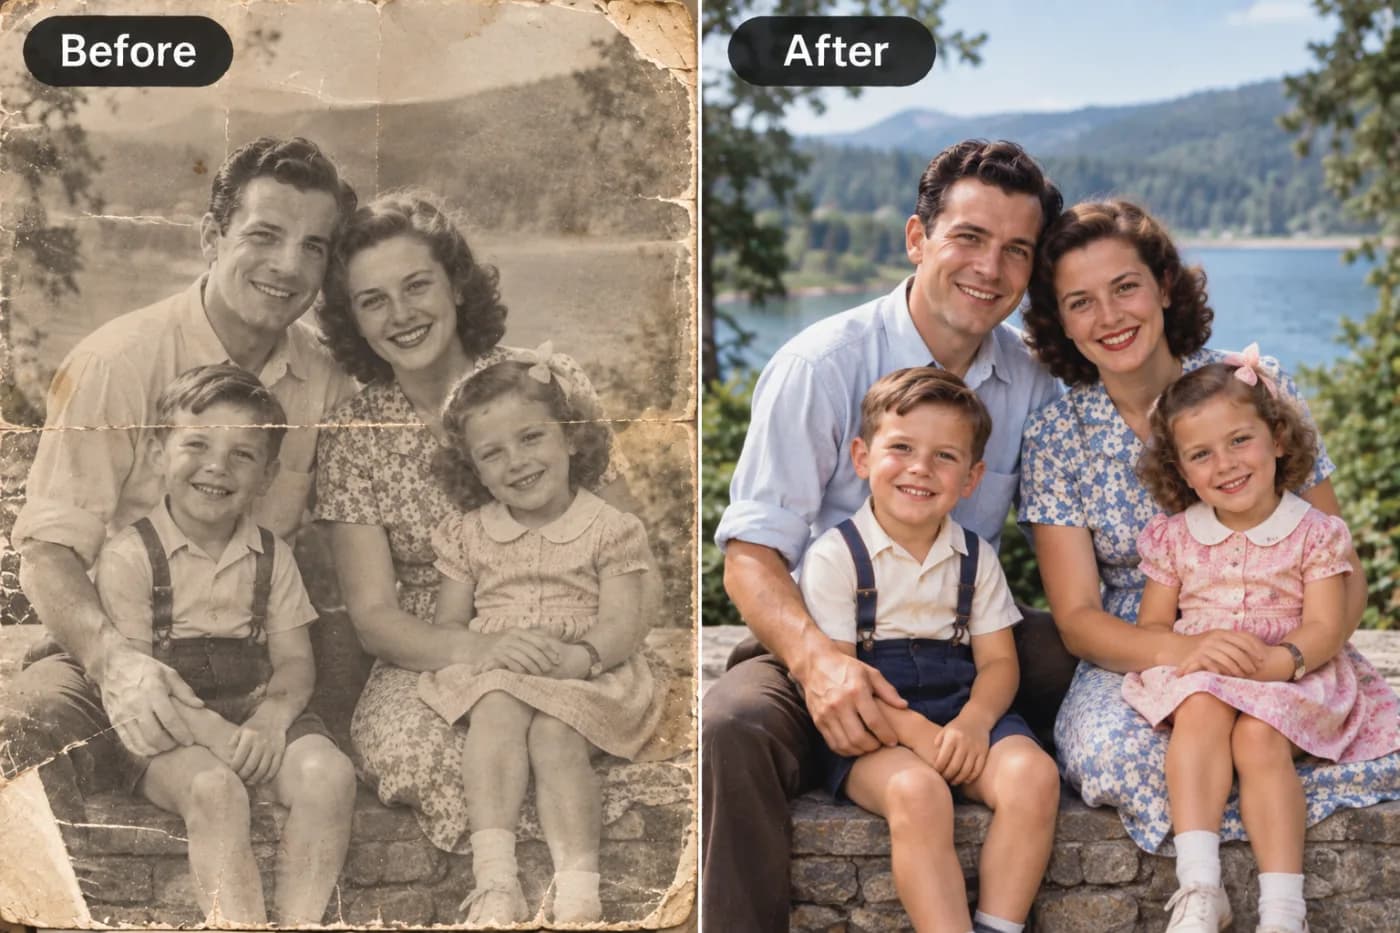
Combine with restoration for old images. For vintage or degraded photos headed to 4K, use Pro AI mode so noise reduction and detail recovery happen alongside the enlargement, rather than upscaling flaws to a larger, more visible size.
Match output to print DPI. For print, 4K pixels translate to specific physical sizes at 300 DPI. Knowing your target print dimensions helps you choose a factor that delivers enough resolution without unnecessary over-enlargement.
Upscale then downsample for maximum crispness. Enlarging slightly beyond your target and then scaling down to exact dimensions can produce an exceptionally clean, sharp final image — a technique print professionals use to squeeze out extra perceived detail from an ultra-HD upscale.
Upscaling Many Images to 4K at Once
The case for batch processing comes down to three multipliers: time, consistency, and sanity.
Time savings compound fast. Processing images individually means repeating the same five clicks — upload, select settings, process, preview, download — for every single file. At even 30 seconds of hands-on time per image, 100 images eats 50 minutes of your day. Batch processing collapses that into one upload and one download. You set it once and walk away.
Consistency across the set. When you process images one by one, it's easy to accidentally use 2x on some and 4x on others, or forget a setting halfway through. Batch processing applies identical settings to every image, so your entire product catalog, gallery, or content library looks uniform. For e-commerce especially, visual consistency across listings looks professional and builds trust.
Reduced error and fatigue. Manual repetition breeds mistakes. By the 60th image, you're tired, clicking on autopilot, and more likely to skip files or misapply settings. Automation eliminates that human error entirely.
The bottom line: if you regularly upscale more than a handful of images, batch processing isn't a nice-to-have — it's the only sensible way to work. Pixel Shine's batch editor is built precisely for this, letting you upscale multiple images at once without the one-by-one grind.
Frequently Asked Questions
Is Pixel Shine's 4K upscaler really free?Yes. The Normal upscaler is free, unlimited, and needs no sign-up. A 4x factor on a roughly 1000-pixel source reaches 4K resolution at no cost.
What counts as a 4K image?4K is approximately 3840x2160 pixels — around 8.3 million total, four times the detail of 1080p HD, and the standard for high-end screens and premium print.
Will the upscaled image be genuinely sharp at 4K?Yes. Pixel Shine uses AI super-resolution that reconstructs real detail, so your 4K result looks crisp rather than merely enlarged like basic resizers produce.
Does it add watermarks?No. Every downloaded 4K file is clean and watermark-free, ready for wallpapers, print, and commercial use.
What source resolution do I need?A source near 1000 pixels wide hits 4K at 4x; a 1920-pixel source reaches exactly 3840 at 2x. Larger, cleaner sources yield the best ultra-HD results.
Do I need to download software?No. Pixel Shine runs entirely online at Pixel Shine on any device, with nothing to install.
When is Pro AI mode worth using for 4K?Use it for large 4K prints, critical portraits, or heavily degraded sources needing maximum detail recovery.
Can I upscale above 4K?Yes. Higher factors or additional passes from the source let you push resolution beyond 4K for very large prints and displays.
Key Takeaways
A free 4K image upscaler is only worth using if it delivers real ultra-HD sharpness rather than a bigger, blurrier image — and that requires genuine AI super-resolution. Pixel Shine provides exactly that with an unlimited free Normal upscaler, clean watermark-free output, no mandatory sign-up, and a Pro AI mode for the most demanding 4K work.
Whether you're crafting 4K wallpapers, prepping large prints, or filling ultra-HD displays, Pixel Shine reconstructs true detail so your images shine at full resolution. Experience it now at Pixel Shine and upscale your first image to 4K free.