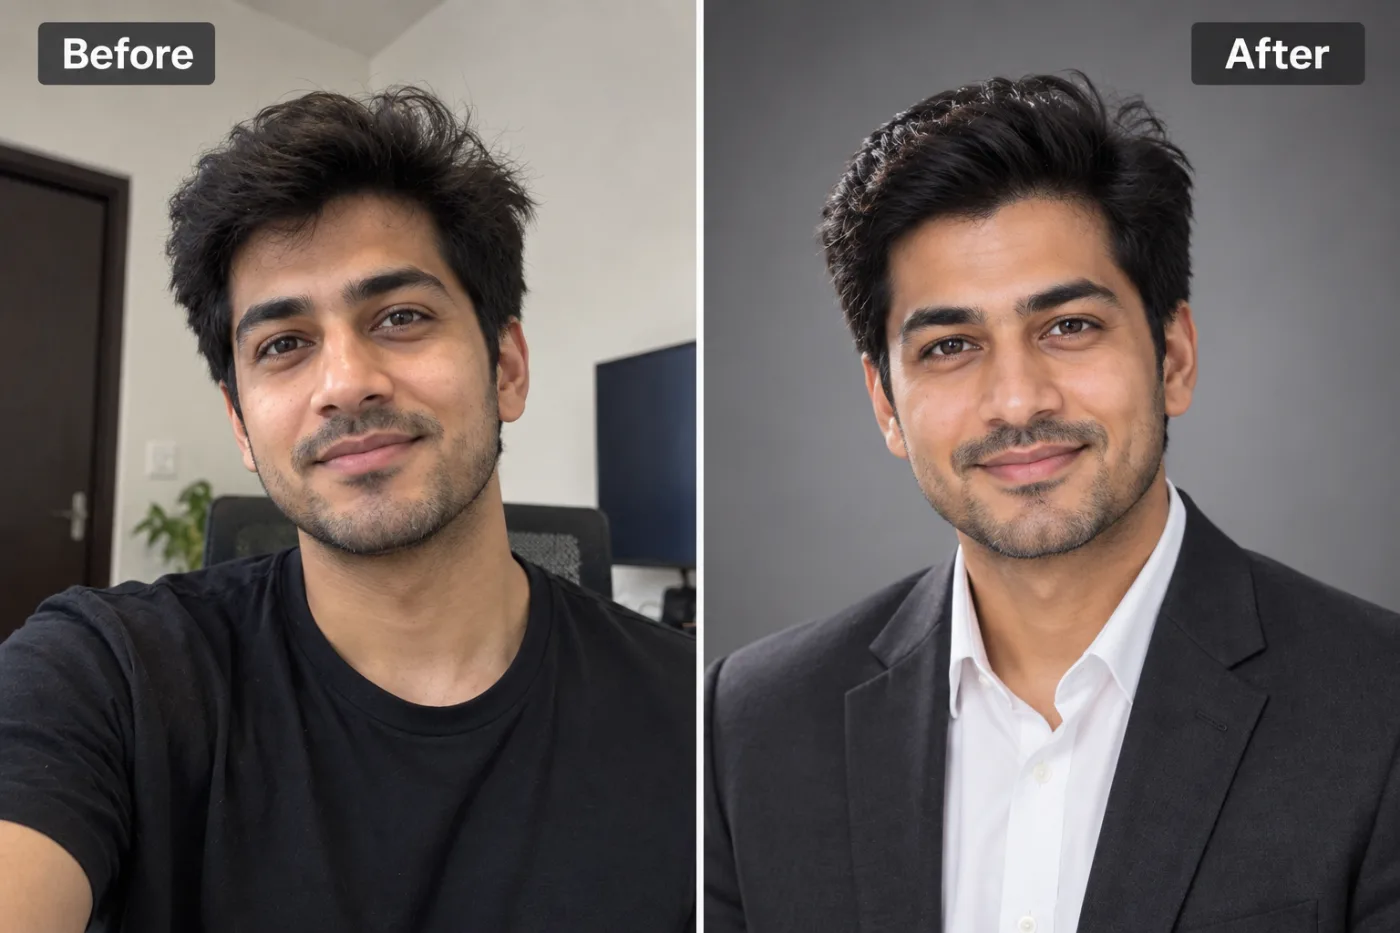
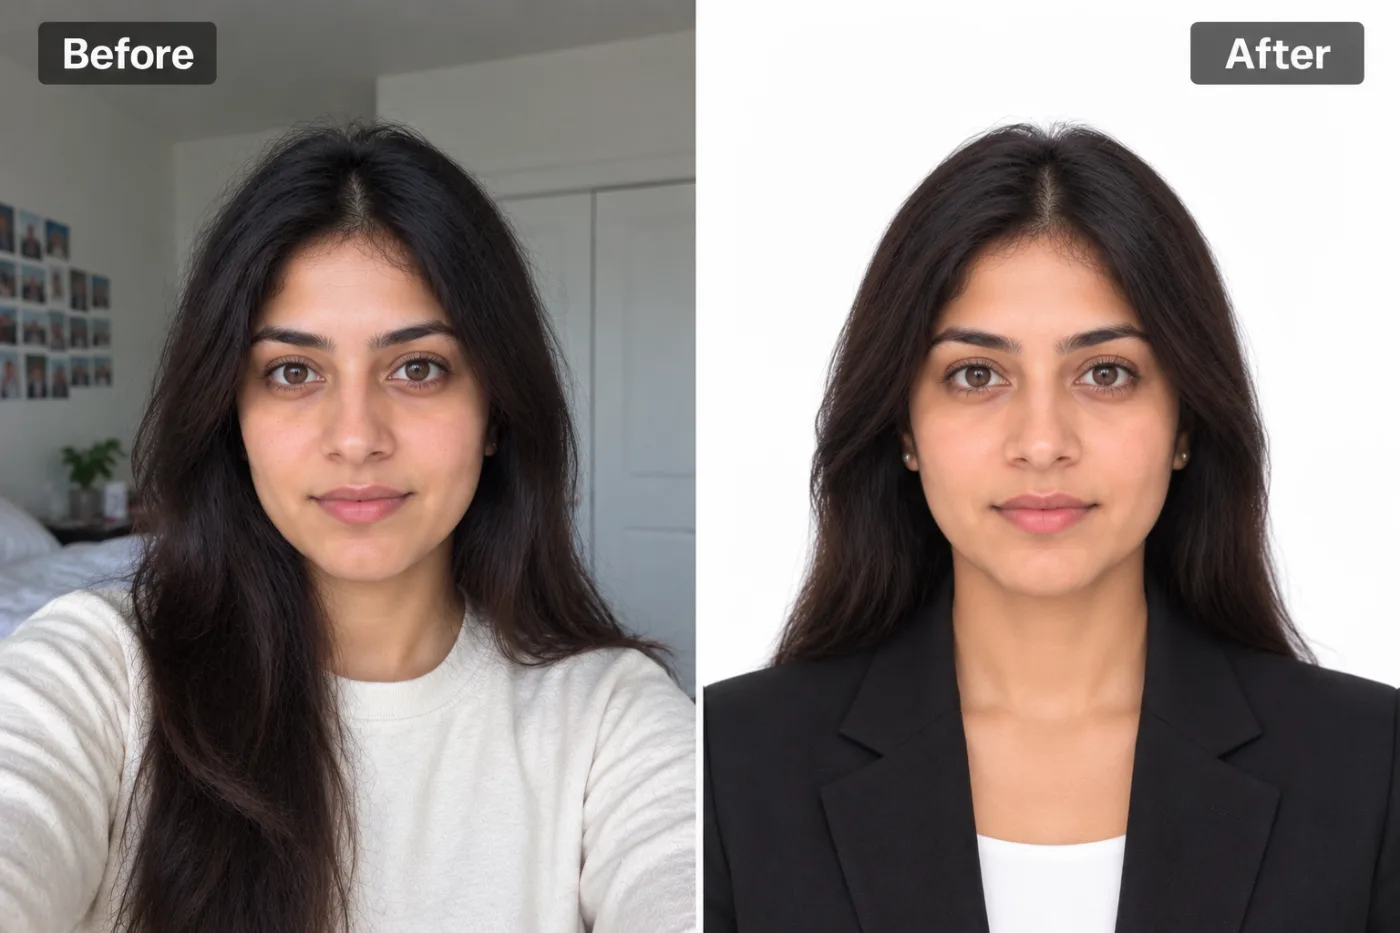
Enhance Portrait Photos with AI for Free — Sharper, More Detailed Results
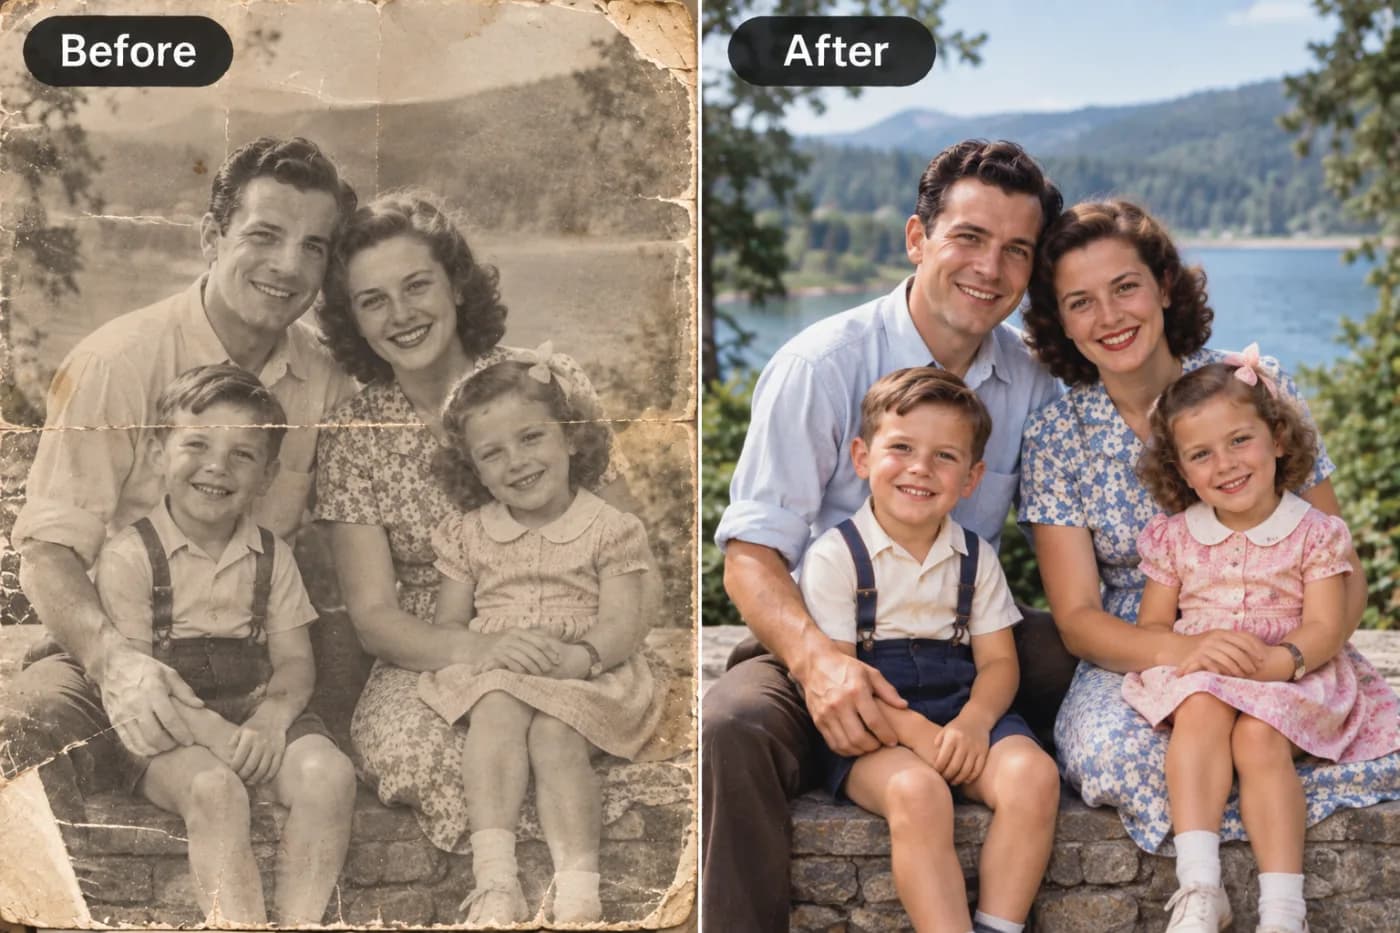
Portrait photos need special treatment — too much sharpening and skin looks unnatural; too little and the subject looks soft. Pixel Shine's AI portrait enhancement gets the balance right, for free.
If you want to enhance portrait photos with AI for free, you're after one specific thing: sharper, more detailed faces that still look natural — not plasticky, over-smoothed, or obviously edited. Portrait enhancement is uniquely demanding because our eyes are experts at reading faces. We instantly notice when skin looks waxy, when eyes lose their catchlights, or when hair turns into a smeared blob. Getting it right requires AI that reconstructs facial detail convincingly, and that's exactly what this guide is about.
Whether you're polishing a headshot for LinkedIn, sharpening a soft phone selfie, rescuing a blurry candid, or preparing a portrait for print, AI can transform the result in seconds — for free, with no watermark and no sign-up required. In this guide, you'll learn why portraits are tricky to enhance, how Pixel Shine reconstructs faces naturally, a precise step-by-step workflow, and the pro tips that keep results looking real. We'll also cover the mistakes that make AI portraits look fake and how to avoid them. By the end, you'll be able to produce crisp, professional-looking portraits from ordinary photos, completely free.
Why Portrait Photos Are Hard to Enhance
Portraits present a unique enhancement challenge because human faces are the most scrutinized subject in photography. Our brains are wired to read faces in incredible detail, so any flaw in the enhancement — a smeared eyelash, waxy skin, or a distorted feature — jumps out immediately in a way it wouldn't for a landscape or a product.
Several factors degrade portraits in the first place. Low light introduces noise that muddies skin tone and softens detail. Front-facing phone cameras often have smaller sensors and lower resolution, producing soft selfies. Motion and focus errors blur faces, and compression from social media strips away the fine texture that makes a portrait look sharp.
Traditional enhancement makes portraits especially risky. Aggressive sharpening creates ugly halos around facial edges and amplifies skin blemishes. Heavy noise reduction, meant to clean grain, instead smears skin into a plasticky, mannequin-like surface — the dreaded "over-smoothed" look. Getting the balance right by hand takes real retouching skill and time.
This is why portrait-specific AI matters. A good model must sharpen genuine detail — eyelashes, hair strands, skin texture — while intelligently reducing noise, all without crossing into artificial territory. That delicate balance is where general-purpose editing tools struggle and where trained AI reconstruction shines.
How Pixel Shine Enhances Portraits Naturally
Pixel Shine enhances portraits using deep-learning models trained on vast collections of high-resolution facial images. Because the AI has effectively studied how real faces look at high resolution, it reconstructs believable detail — defined eyelashes, natural skin texture, crisp hair strands — rather than crudely sharpening, which is what produces the artificial look on ordinary tools.
For portraits, the Pro AI Upscaler is often the best choice, applying stronger reconstruction that handles the fine facial detail our eyes scrutinize most. It uses credits. The free Normal Upscaler also improves portraits noticeably and is unlimited with no sign-up, making it ideal for casual shots or when you want a lighter, more natural touch.
Crucially, every result downloads watermark-free at full resolution. For portraits — especially professional headshots destined for profiles or print — a logo stamped across the face would be a dealbreaker. Pixel Shine keeps your output clean.
Beyond upscaling, Pixel Shine's broader platform includes an AI Headshot Generator for creating polished professional headshots from casual photos, plus a background remover and text-prompt editor. So enhancing a portrait can be one step in a fuller workflow — sharpen the face, swap the background, and generate a professional look, all free or with trials, in one online platform.
Step-by-Step: Enhancing a Portrait with AI
Here's the workflow for sharper, natural-looking portraits:
1. Open Pixel Shine. Go to Pixel Shine and navigate to the upscale / enhance tool. It runs online on desktop or mobile.
2. Upload your portrait. Drag and drop or browse to your file (JPG, PNG, or WebP). The Normal Upscaler requires no account, so you can begin instantly.
3. Assess the face. Note the main issues — softness, noise, low resolution — so you can judge the improvement afterward.
4. Choose your mode. For important headshots or heavily degraded faces, select the Pro AI engine. For casual portraits or a natural touch, use the free Normal Upscaler.
5. Set the scale. Choose 2x for web and profile use, or higher for print. Avoid over-scaling, which can make skin look artificial.
6. Enhance and preview. Click enhance. In about 5–10 seconds, you'll see a before/after comparison. Zoom into the eyes, skin, and hair specifically.
7. Judge naturalness. Confirm skin still has texture (not waxy), eyes have catchlights, and hair looks like strands, not a blob. If it looks over-processed, drop to Normal mode or a lower scale.
8. Download. Save the enhanced portrait at full resolution with no watermark. Keep it in high quality for profiles or printing.
Pro Tips for Natural Portrait Enhancement
Keep your enhanced portraits looking real with these expert tricks:
Prioritize skin texture over smoothness. The hallmark of a natural portrait is visible skin texture. If enhancement makes skin look like plastic, dial back the scale or switch to Normal mode. Real skin has pores and subtle variation.
Watch the eyes closely. Eyes are the focal point of any portrait. After enhancing, confirm the irises are crisp and the catchlights (reflections) are intact. Blurry or dead eyes ruin an otherwise good result.
Use Pro for the important shots. Professional headshots and photos you'll print deserve the Pro engine's stronger facial reconstruction. Save Pro AI for these rather than casual selfies.
Enhance before background editing. If you plan to remove or swap the background, enhance the portrait first so the face gains maximum detail, then handle the background.
Don't stack beauty filters afterward. Adding smoothing or sharpening filters on top of AI enhancement usually tips the result into the uncanny valley. Let the AI do the work, then make only light tone adjustments.
Match resolution to the destination. A LinkedIn photo needs far less resolution than a printed portrait. Choosing the right scale keeps the result crisp and natural for its actual use.
Common Mistakes to Avoid
Avoid these portrait-specific pitfalls:
Over-smoothing into plastic skin. The most common mistake is pushing enhancement so hard that skin loses all texture and looks waxy. Natural pores and subtle variation are what make a face look real — preserve them by not over-scaling.
Ignoring the eyes and hair. These fine-detail areas reveal poor enhancement fastest. If eyes look dead or hair smears into a blob, the result will read as fake no matter how smooth the skin is.
Using the wrong mode. Applying aggressive Pro reconstruction to an already-decent portrait can over-process it, while using only Normal mode on a badly degraded face may leave it too soft. Match the mode to the image.
Enhancing a heavily compressed re-share. A portrait that's been through several social media compressions has lost fine detail the AI can't fully recover. Start from the original whenever possible.
Skipping the zoom-in review. Portraits demand close inspection. Always zoom into the face in the preview to catch artifacts before downloading, because flaws in faces are far more noticeable than in other subjects.
Real-World Use Cases
AI portrait enhancement helps in many practical situations:
Professional headshots. Job seekers and professionals sharpen LinkedIn and résumé photos so they look crisp and credible, making a stronger first impression.
Social media profiles. Creators and everyday users enhance profile pictures and selfies so their faces look sharp and polished across platforms.
Rescuing candid moments. That perfect but slightly blurry candid of a loved one can be sharpened so the memory is preserved clearly.
Print portraits and gifts. Families enhance portraits before printing them for frames, albums, or gifts, ensuring faces look detailed at larger sizes.
Team and about pages. Small businesses enhance staff portraits for websites and about pages so their team looks professional and consistent, boosting credibility with visitors.
Advanced Portrait Techniques
Take portrait enhancement further with these advanced approaches.
Combine enhancement with the headshot generator. For a truly polished professional look, first enhance a casual portrait to sharpen the face, then use Pixel Shine's AI Headshot Generator to place it in a professional style and setting. This two-step workflow turns an ordinary selfie into a business-ready headshot.
Enhance, then swap the background. Use the background remover to isolate the subject after enhancing the face. A sharp face on a clean or professional background looks far more intentional than a soft portrait on a cluttered one.
Match mode to face condition. For very soft or low-resolution faces, the Pro engine's stronger reconstruction is worth a trial. For portraits that are already fairly sharp and just need a light boost, the free Normal mode preserves naturalness better and avoids over-processing.
Consider print resolution early. If a portrait is destined for a large print, plan the scale factor to reach print-ready resolution in one clean pass rather than upscaling repeatedly. Thoughtful scaling keeps skin and eye detail natural at large sizes. By layering these techniques — enhancement, headshot generation, and background work — you can produce portraits that look professionally retouched, using free and trial-based tools entirely online.
Who Enhances Portraits and Why
Portrait enhancement serves a wide range of people with a shared need for sharp, natural-looking faces.
Job seekers and professionals enhance headshots for LinkedIn, résumés, and company profiles to project credibility. Content creators and influencers sharpen selfies and profile photos to keep their personal brand polished. Small business owners enhance team portraits for websites and about pages.
Photographers and freelancers use AI to quickly clean up soft client portraits. Families restore and sharpen portraits of loved ones for printing and preservation. Dating app users improve profile photos so they look their best. Across all these groups, the priority is the same: a sharper, more detailed face that still looks genuinely real, produced for free without professional retouching skills.
Frequently Asked Questions
How can I enhance portrait photos with AI for free?Use Pixel Shine's Normal Upscaler at Pixel Shine — it's free, unlimited, and needs no sign-up. Upload your portrait, choose a scale, and download the sharper result with no watermark. For maximum facial detail, try the Pro engine.
Will AI enhancement make my portrait look fake?Not if done right. Pixel Shine reconstructs natural facial detail rather than crudely smoothing. Avoid over-scaling and stacking filters, and preserve skin texture to keep results looking real.
Which mode is best for portraits?The Pro AI engine is best for important headshots and heavily degraded faces, thanks to stronger facial reconstruction. The free Normal mode works well for casual portraits and lighter touch-ups.
Can I enhance a headshot for LinkedIn?Yes. Enhance the photo for sharpness, and optionally use Pixel Shine's AI Headshot Generator to create a fully professional look. Downloads are watermark-free at full resolution.
Does enhancement fix blurry faces?AI significantly sharpens mild blur and soft focus. Severe motion blur is harder to fully reverse, but the result is almost always noticeably clearer than the original.
Will there be a watermark on my portrait?No. Pixel Shine downloads portraits at full resolution with no watermark, which is essential for professional and profile use.
Can I enhance portraits on my phone?Yes. Pixel Shine runs on mobile, so you can sharpen selfies and portraits directly on your phone with no app to install.
How do I keep skin looking natural?Avoid over-scaling and don't add smoothing filters afterward. Preserve visible skin texture — real skin has pores and subtle variation. If skin looks waxy, use Normal mode or a lower scale.
Key Takeaways
Enhancing portrait photos with AI for free is entirely possible when you use a tool built to reconstruct faces naturally. Pixel Shine's Normal Upscaler sharpens portraits with no sign-up, no watermark, and no cost, while the Pro engine delivers stronger facial detail for important headshots.
The secret to natural results is preserving skin texture, keeping eyes crisp, and avoiding over-processing. Combine enhancement with the AI Headshot Generator and background remover for a fully professional finish. Whether it's a LinkedIn photo, a selfie, or a family portrait, you can make faces sharper and more detailed while keeping them real. Enhance your first portrait free at Pixel Shine.